This guide explores the best clams recipes for beginners, breaking down the process into manageable steps. Whether you are craving a comforting bowl of chowder, a sophisticated pasta dish, or a simple pot of steamed goodness, these recipes are designed to build your confidence in the kitchen. We will cover everything from buying fresh clams to the final garnish, ensuring your first attempt is a resounding success.
Understanding Clams: A Quick Primer
Before diving into the recipes, it is essential to know what you are buying. Not all clams are created equal, and different varieties suit different cooking methods. For the beginner recipes listed below, you will primarily encounter hard-shell clams (quahogs) and soft-shell clams (steamers).
Littlenecks are the smallest hard-shell clams and are prized for their sweetness and tender texture. They are the gold standard for pasta dishes and eating raw. Cherrystones are slightly larger and work well for stuffing or baking. Steamers have a protruding siphon and softer shells; they are excellent for steaming but require thorough cleaning to remove sand.
Step 1: How to Select and Clean Clams
The secret to the best clam recipes lies in the preparation. If you start with fresh, clean shellfish, half the work is already done. When buying clams, ensure they smell like the ocean—fresh and salty, never fishy or ammonia-like. The shells should be tightly closed. If a shell is slightly open, give it a gentle tap; if it snaps shut, it is alive and good to eat. If it remains open, discard it.
The Purging Process
Nothing ruins a meal faster than biting into sand. To avoid this, you must ‘purge’ your clams. Place the clams in a bowl of cold water mixed with sea salt (about 1/3 cup of salt per gallon of water) for 20 to 30 minutes. This mimics sea water, encouraging the clams to filter feed and expel any grit or sand inside their shells. After soaking, lift the clams out of the water (do not dump the water over them, or the sand will fall back on top) and scrub the shells with a stiff brush.
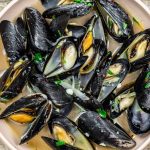
Recipe 1: Classic Steamed Clams with Garlic and White Wine
This is arguably the easiest and most rewarding way to cook clams. It requires minimal ingredients and takes less than 15 minutes from start to finish. The result is a pot of tender clams and a broth so delicious you will need plenty of crusty bread to sop it up.
- 2 lbs Littleneck or Manilla clams, scrubbed
- 2 tbsp olive oil
- 3 cloves garlic, minced
- 1 cup dry white wine (Sauvignon Blanc or Pinot Grigio)
- 2 tbsp unsalted butter
- Fresh parsley, chopped
- Lemon wedges
Heat the olive oil in a large pot over medium heat. Add the minced garlic and sauté for about one minute until fragrant, being careful not to burn it. Pour in the white wine and bring it to a simmer. Gently add the clams to the pot and cover with a tight-fitting lid.
Let the clams steam for 5 to 7 minutes. Shake the pot occasionally to distribute the heat. As the clams cook, they will pop open. Once most are open, remove the pot from the heat. Discard any clams that remain closed. Stir in the butter and fresh parsley, allowing the butter to melt into the broth. Serve immediately with lemon wedges and toasted bread.
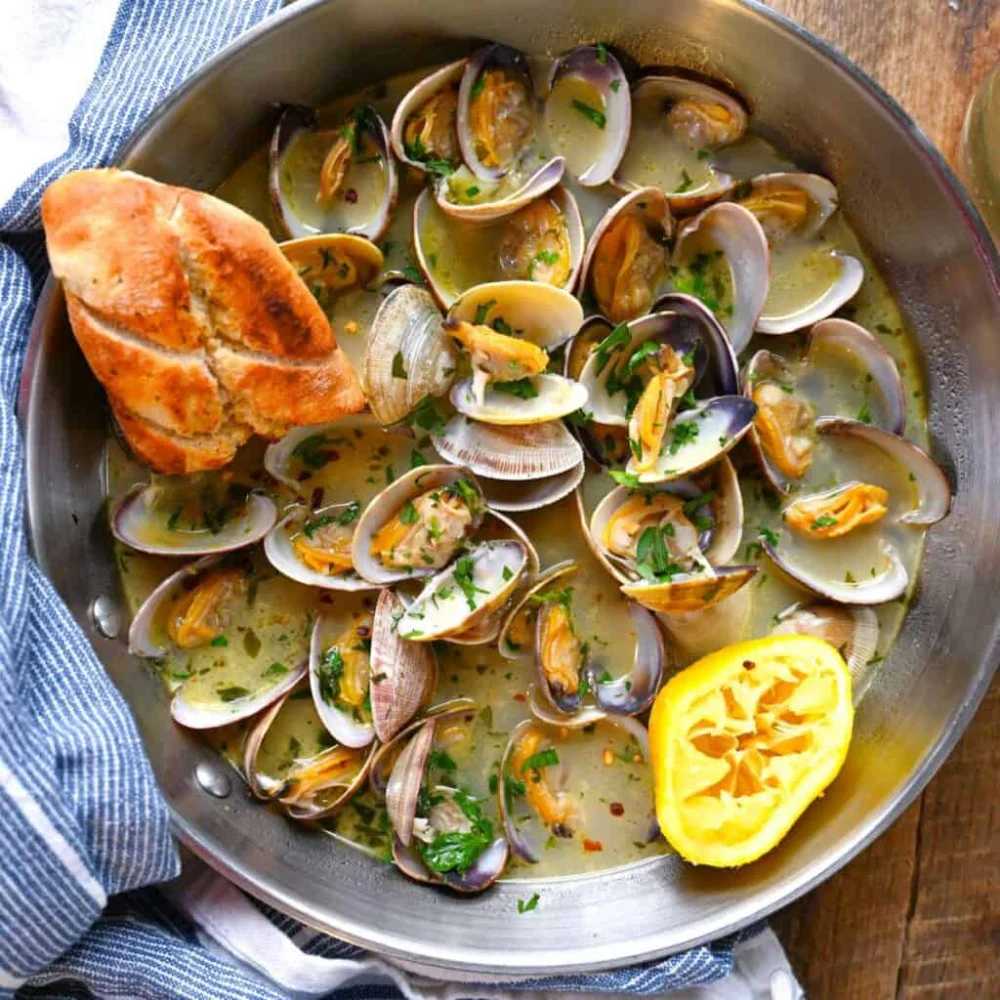
Recipe 2: Easy Linguine with Clams (Linguine alle Vongole)
Pasta and clams are a match made in culinary heaven. This Italian classic looks elegant but is fundamentally a simple pantry meal. The starch from the pasta helps thicken the white wine sauce, coating the noodles in briny flavor.
- 1 lb Linguine or Spaghetti
- 2 lbs Littleneck clams
- 4 cloves garlic, sliced thinly
- 1/2 tsp red pepper flakes
- 1/2 cup white wine
- 1/4 cup fresh parsley
- Olive oil
Bring a large pot of salted water to a boil and cook the pasta until it is just shy of al dente. While the pasta cooks, heat olive oil in a large skillet. Add the garlic and red pepper flakes, cooking until the garlic is golden. Add the wine and clams, covering the skillet to steam them until they open (about 6 minutes).
Transfer the cooked pasta directly into the skillet with the clams. Add a splash of pasta water if the sauce looks too dry. Toss everything together over medium heat for one minute to let the flavors meld. Finish with a generous handful of parsley and a drizzle of high-quality olive oil before serving.
Recipe 3: Beginner-Friendly Clam Chowder
New England Clam Chowder is famous for its creamy richness, but making it from scratch can seem daunting. This simplified version focuses on flavor without requiring complex roux-making techniques, making it perfect for beginners.
- 2 cans of chopped clams (juice reserved) or 2 lbs fresh clams steamed and chopped
- 3 slices of bacon, chopped
- 1 onion, diced
- 2 celery stalks, diced
- 2 potatoes, peeled and cubed
- 1 cup heavy cream
- 1 cup milk
- Thyme and bay leaf
In a heavy soup pot, cook the bacon until crisp. Remove the bacon bits but leave the fat in the pot. Add the onion and celery, cooking until soft. Sprinkle a tablespoon of flour over the vegetables and stir for a minute to cook off the raw flour taste.
Pour in the reserved clam juice (and extra bottled clam juice if needed to cover potatoes) and add the potatoes, thyme, and bay leaf. Simmer until the potatoes are tender, usually about 15 minutes. Stir in the milk, cream, and chopped clams. Simmer gently for another 5 minutes to heat through—do not boil, or the dairy may curdle. Garnish with the crispy bacon and serve with oyster crackers.
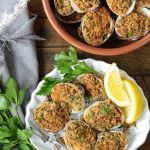
Recipe 4: Grilled Clams with Herb Butter
If you are intimidated by pots and pans, try the grill. Grilling clams adds a subtle smoky flavor that pairs beautifully with herbs. This method is foolproof because the grill does all the work.
Preheat your grill to medium-high heat. While it heats up, mix softened butter with garlic, parsley, chives, and a squeeze of lemon juice. Place the cleaned clams directly on the grill grates. Close the lid and cook for 5 to 8 minutes.
As soon as the clams pop open, carefully remove them with tongs (try not to spill the juice inside the shell). Top each open clam with a dollop of the herb butter, allowing it to melt instantly. Serve on a platter for a fantastic summer appetizer.
Common Mistakes to Avoid
Even with the best recipes, beginners can stumble if they aren’t careful. Here are the most common pitfalls when cooking clams and how to avoid them.
1. Overcooking the Clams: Clams cook very quickly. Once the shell opens, they are done. If you leave them on the heat too long, the meat will turn rubbery and tough. Keep a close eye on the pot and remove them as soon as they are ready.
2. Forgetting the Salt: While clams are naturally salty, the pasta or potatoes you serve them with are not. Ensure you season the other components of your dish properly to balance the brininess of the seafood.
3. Eating Closed Clams: This is the golden rule of shellfish safety. If a clam has not opened after being steamed or grilled, it was likely dead before cooking. Do not try to pry it open; simply discard it to ensure safety.
Health Benefits of Clams
Beyond their delicious taste, clams are a nutritional powerhouse. They are one of the best sources of Vitamin B12, which is vital for nerve function and energy. They are also rich in lean protein, high in iron (even more than beef liver), and contain heart-healthy Omega-3 fatty acids. Incorporating clams into your diet is a tasty way to boost your mineral intake.
Expert Tips for Success
- Use the right wine: Never cook with a wine you wouldn’t drink. A crisp Pinot Grigio or Sauvignon Blanc works best. Avoid oaked Chardonnays, which can make the dish taste bitter.
- Don’t waste the ‘liquor’: The juice released by the clams during cooking is called clam liquor. It is salty and flavorful. Strain it through a cheesecloth if you are worried about grit and use it as a base for sauces or soups.
- Fresh herbs are key: Dried herbs often get lost in the strong brine of the clams. Always opt for fresh parsley, basil, or dill to cut through the richness.
Frequently Asked Questions (FAQ)
Can I use frozen clams for these recipes?
Yes, frozen clams are a convenient option, especially for chowders or pasta sauces. They are usually pre-cleaned and cooked, so you just need to thaw them and add them at the very end of the cooking process to warm them through. However, for steamed clams, fresh is always superior.
How long can I keep fresh clams in the fridge?
Fresh clams should be cooked as soon as possible, ideally within 24 hours of purchase. Store them in an open bowl in the refrigerator covered with a damp cloth. Never store them in water or a sealed plastic bag, as they need to breathe.
What if I don’t drink alcohol?
If a recipe calls for white wine, you can substitute it with chicken broth, vegetable broth, or bottled clam juice mixed with a splash of lemon juice or white wine vinegar to replicate the acidity.
Conclusion
Cooking shellfish at home doesn’t have to be a complex ordeal reserved for professional chefs. By starting with these beginner-friendly clam recipes, you can enjoy fresh, flavorful seafood right in your own kitchen. Whether you choose the simplicity of steaming, the comfort of chowder, or the elegance of pasta, the key lies in fresh ingredients and careful timing. With a little practice, you will find that clams are one of the most versatile and forgiving proteins to cook, offering a high reward for minimal effort. So, head to your local fishmonger, pick up a bag of littlenecks, and start cooking!