The journey to perfect tempura shrimp begins with the right ingredients. The quality of the shrimp, the type of flour, and even the temperature of the water play crucial roles in the final result. Understanding these elements is the foundation for success.
First and foremost, the shrimp themselves are key. Opt for fresh, high-quality shrimp. Look for shrimp that are firm to the touch, with a slight sheen, and a fresh, briny aroma. Avoid shrimp that appear discolored or have a strong, unpleasant odor. Size matters too; medium to large shrimp are ideal for tempura, as they offer a good ratio of batter to shrimp. Consider purchasing shrimp that are already deveined and peeled to save time. However, if you’re working with shrimp that still have the shells on, make sure to peel them and devein them properly.
Flour is the heart of the tempura batter. The type of flour you choose greatly impacts the texture of the final product. All-purpose flour can be used, but for the best results, consider using cake flour or tempura flour. Cake flour has a lower protein content than all-purpose flour, resulting in a lighter, crispier batter. Tempura flour is specially formulated for this purpose, often containing cornstarch or other ingredients that enhance crispiness. Avoid using flours with high protein content, as they can lead to a tougher batter.
Cold water is essential for creating a light and airy batter. The cold temperature inhibits gluten development, which is what makes the batter crispy and not chewy. Ice water, or even water with ice cubes in it, is the best choice. Avoid using tap water that isn’t sufficiently chilled.
Other essential ingredients include: cornstarch (optional, for added crispiness), baking powder (optional, for extra lift), and salt (for seasoning).
Prepping the shrimp is a crucial step that often gets overlooked. Properly prepared shrimp will cook evenly and result in a better overall texture.
Deveining the shrimp is important for both appearance and taste. Using a small paring knife, make a shallow slit along the back of the shrimp and remove the dark vein. This vein is the digestive tract and can be gritty if not removed.
Peeling the shrimp is also necessary if you’re not using pre-peeled shrimp. Leave the tail on for a more elegant presentation. If the tail is not left on, the shrimp can be cooked with the shell on.
Butterflying the shrimp can help them cook more evenly and create a more visually appealing dish. To butterfly, make a series of shallow cuts along the underside of the shrimp, being careful not to cut all the way through. Gently flatten the shrimp.
Drying the shrimp thoroughly is essential. Excess moisture on the shrimp will prevent the batter from adhering properly and can lead to a soggy result. Pat the shrimp dry with paper towels before battering.
Seasoning the shrimp with a little salt and pepper before battering can enhance the overall flavor.
Now that the ingredients are ready and the shrimp are prepped, it’s time to make the batter. The batter is the magic that transforms the shrimp into a crispy delight. There are a few key techniques to master.
In a bowl, gently whisk together the flour, cornstarch (if using), baking powder (if using), and salt. Do not overmix; a few lumps are perfectly fine. Overmixing develops the gluten and will result in a tougher batter.
Gradually add the ice-cold water to the dry ingredients, whisking gently until just combined. The batter should be slightly lumpy; do not overmix. The goal is to keep the batter cold and prevent gluten formation.
Important: Do not let the batter sit for too long. Prepare it just before frying.
- Keep the batter cold: Refrigerate the batter for 15-30 minutes before frying for an even crispier result.
- Don’t overmix: Overmixing develops gluten, resulting in a tough batter.
- Add a touch of vodka or club soda: This can help make the batter even lighter and crispier.
The frying process is where the magic truly happens. Careful attention to temperature and technique is essential for achieving perfectly crispy tempura shrimp.
Choose the right oil: Use an oil with a high smoke point, such as vegetable oil, canola oil, or peanut oil. Avoid oils with lower smoke points, as they can burn and impart an unpleasant flavor.
Heat the oil to the correct temperature: The ideal frying temperature is between 350-375°F (175-190°C). Use a deep-fry thermometer to monitor the oil temperature accurately. Too low, and the shrimp will be soggy; too high, and the batter will burn before the shrimp cooks through.
- Dip the prepared shrimp into the batter, ensuring they are fully coated.
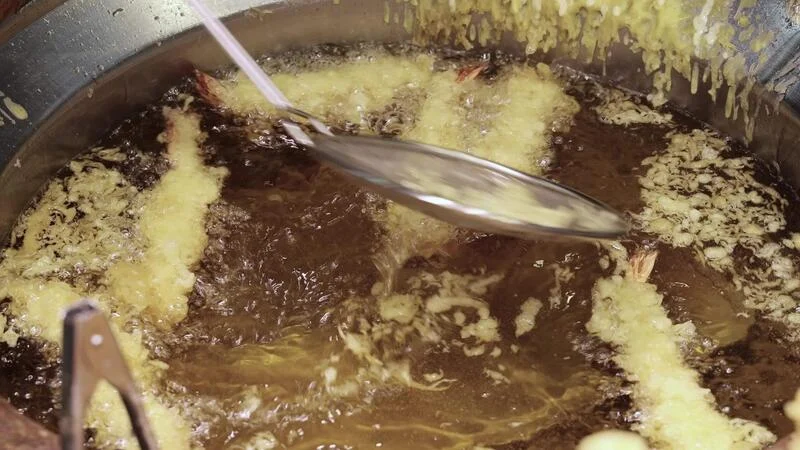
- Gently place the battered shrimp into the hot oil, being careful not to overcrowd the fryer. Fry in batches.
- Fry for about 2-3 minutes, or until the batter is golden brown and crispy.
- Flip the shrimp halfway through to ensure even cooking.
- Remove the shrimp from the oil with a slotted spoon or tongs, and place them on a wire rack to drain excess oil.
- Soggy shrimp: The oil temperature was too low, the batter was too thick, or the shrimp weren’t dried properly.
- Burnt batter: The oil temperature was too high.
- Batter falling off: The shrimp wasn’t dried properly, or the batter was too thin.
Serve tempura shrimp immediately after frying for the best texture and flavor. The longer they sit, the more they will lose their crispiness.
Traditional accompaniments: Tempura shrimp is often served with a dipping sauce, such as tempura sauce (tsuyu), ponzu sauce, or a simple soy sauce with grated daikon radish and ginger. Other options include lemon wedges, chili flakes, or a sprinkle of sea salt.
- Serve the tempura shrimp over a bed of rice with a drizzle of your favorite sauce.
- Use the tempura shrimp as a topping for salads or bowls.
- Create tempura shrimp tacos or sliders.
- Don’t overcrowd the fryer: Fry in batches to maintain the oil temperature.
- Drain excess oil: Place the fried shrimp on a wire rack to drain any excess oil.
- Serve immediately: The longer the shrimp sit, the less crispy they will be.
Mastering the art of frying tempura shrimp is a rewarding culinary journey. By understanding the ingredients, the batter-making process, and the frying techniques, you can create a dish that’s both visually stunning and incredibly delicious. With practice and attention to detail, you’ll be able to consistently produce tempura shrimp that are perfectly crispy, crunchy, and a true delight to eat.
Experiment with different types of shrimp, flours, and dipping sauces to find your perfect tempura shrimp recipe. Don’t be afraid to get creative and put your own spin on this classic dish.
The key to success is patience and attention to detail. Take your time, follow the steps, and enjoy the process. The results will be well worth the effort.
Enjoy your crispy, crunchy tempura shrimp!