Pan-searing is widely considered the superior method for cooking tilapia fillets. Unlike baking, which can sometimes lead to a soggy texture, or deep-frying, which adds unnecessary heaviness, pan-searing offers the best of both worlds. It creates a delightful contrast in textures: a golden-brown, slightly crispy exterior that gives way to moist, tender meat inside. It is a technique that relies on heat control, timing, and a little bit of patience.
In this comprehensive guide, we are going to walk through everything you need to know to master pan-seared tilapia. We will move beyond basic recipes and look at the why and how of the cooking process. Whether you are a novice cook trying to get dinner on the table or an enthusiast looking to perfect your fish cookery, these techniques will elevate your game.
Selecting the Perfect Fillet
Great cooking always starts with great ingredients. With tilapia, freshness is paramount. If you are buying fresh fillets from a seafood counter, use your senses. The fish should smell like the ocean—clean and briny—never fishy or ammonia-like. The flesh should be firm to the touch and bounce back when pressed, rather than leaving an indentation. Look for fillets that have a translucent, pinkish-white hue; avoid any that look dull, gray, or have dried-out edges.
If you are using frozen tilapia, which is a very common and practical choice, the thawing method matters. Ideally, you should move the frozen fillets to the refrigerator the night before you plan to cook them. This slow thawing process preserves the cellular structure of the meat. If you are in a rush, seal the fish in a plastic bag and submerge it in cold water for 30 minutes. Never thaw fish in warm water or the microwave, as this promotes bacterial growth and degrades the texture before the fish even hits the pan.
The Crucial Prep: Dryness is Key
To avoid this, take your thawed or fresh fillets and pat them down thoroughly with high-quality paper towels. You want the surface to be tacky and dry. Do this on both sides. If you have the time, you can even leave the fillets uncovered in the fridge on a wire rack for 30 minutes. This air-drying technique helps form a pellicle, which aids significantly in achieving that coveted golden crust.
Equipment Essentials: The Right Pan and Tools
The hardware you use dictates the difficulty level of the cook. For pan-searing tilapia, you generally have three choices: non-stick, cast iron, or stainless steel. For beginners, a heavy-bottomed non-stick skillet is the safest bet. Tilapia is a delicate fish with very little connective tissue, meaning it falls apart easily. A non-stick surface ensures you can flip the fish without tearing it to shreds.
However, if you want the ultimate crust, a well-seasoned cast iron skillet is the gold standard. Cast iron retains heat exceptionally well, ensuring the temperature doesn’t drop drastically when the cold fish hits the pan. Stainless steel is excellent for creating a fond (the caramelized bits left in the pan) for a sauce, but it requires precise temperature control to prevent sticking (utilizing the Leidenfrost effect).
Aside from the pan, your most valuable tool is a fish spatula. Unlike standard spatulas, a fish spatula is made of thin, flexible metal with an angled edge. This design allows you to slide gently under the delicate fillet without pushing it around or breaking it. If you don’t have one, it is a worthy investment for your kitchen arsenal.
Choosing Your Fat: Oil vs. Butter
The fat you choose serves two purposes: it prevents sticking and transfers heat. Because searing happens at relatively high temperatures (medium-high), you need an oil with a high smoke point. Extra virgin olive oil is delicious, but it has a low smoke point and can turn bitter or burn at searing temperatures. Instead, opt for avocado oil, grape seed oil, canola oil, or clarified butter (ghee).
The Seasoning Strategy
Seasoning should happen right before the fish goes into the pan. Salt draws out moisture, so if you salt the fish and let it sit for 20 minutes, the surface will become wet again (undoing your drying work). Sprinkle Kosher salt and freshly cracked black pepper on both sides immediately before cooking. Kosher salt is preferred because its coarse grain adheres better to the flesh and provides a cleaner salinity than iodized table salt.
The Technique: Step-by-Step Searing
Step 1: Preheat the Pan. Place your skillet over medium-high heat. Let it get hot. You can test the temperature by flicking a drop of water into the pan; it should sizzle and evaporate immediately. Add enough oil to coat the bottom of the pan—don’t be stingy, as a dry spot equals a stuck spot.
Step 2: The Lay-In. When the oil is shimmering (and just starting to show wisps of smoke), carefully lay the tilapia fillets into the pan. Always lay the fish away from you to prevent hot oil from splashing back onto your hand or apron. Do not overcrowd the pan. If you put too many fillets in at once, the pan temperature plummets, and the fish will steam. Cook in batches if necessary.
Step 3: The Golden Rule—Don’t Touch It! This is where most cooks fail. Once the fish hits the pan, the proteins begin to contract and adhere to the metal. If you try to move it now, it will stick and tear. You must wait. As the Maillard reaction occurs and the crust forms, the fish will naturally release itself from the pan. Depending on the thickness of the fillet, this usually takes 3 to 4 minutes.
Step 4: Visual Cues. Watch the side of the fillet. You will see the color change from translucent pink to opaque white, moving from the bottom up. When the cooked color reaches about two-thirds of the way up the side of the fillet, and the edges look golden brown, it is time to flip.
Step 5: The Flip and Finish. Slide your fish spatula gently under the fillet. If you meet resistance, wait another 30 seconds. If it slides under easily, flip the fish. The second side will cook much faster than the first, usually in just 1 to 2 minutes. This is because the heat has already penetrated most of the way through.
Advanced Technique: Butter Basting (Arrosé)
To achieve a restaurant-quality finish, we employ a French technique called arrosé, or basting. Immediately after flipping the fish, turn the heat down to medium. Toss in two tablespoons of unsalted butter, a crushed clove of garlic, and a sprig of fresh thyme or rosemary.
Tilt the pan slightly so the melting butter pools at the bottom with the herbs and garlic. Use a large spoon to scoop that foaming, hot, aromatic butter and pour it repeatedly over the fish. This cooks the fish gently from the top while infusing it with incredible flavor. It keeps the meat moist and adds a glossy sheen to the final dish.
Determining Doneness
Overcooked tilapia is dry and rubbery. You want to pull the fish off the heat the moment it is done. The FDA recommends an internal temperature of 145°F (63°C). However, because of carryover cooking (the fish continues to cook after leaving the pan), many chefs remove it at around 140°F.
If you don’t have a thermometer, use the fork test. Insert a fork into the thickest part of the fillet and twist gently. The fish should flake easily and be opaque throughout. If it resists flaking or looks jelly-like in the center, it needs another minute.
Flavor Variations to Explore
Once you have mastered the basic sear, you can start experimenting with flavor profiles. Tilapia’s mild taste makes it a chameleon for different cuisines.
- Cajun Blackened: Coat the fish heavily in Cajun spice rub before searing. Use a cast iron skillet and very high heat to char the spices (be prepared for some smoke in the kitchen!).
- Lemon-Caper Piccata: After removing the fish, deglaze the pan with white wine and lemon juice, add capers, and swirl in cold butter to make a pan sauce. Pour this over the fish.
- Asian Fusion: Marinate the fish briefly in soy sauce, ginger, and sesame oil (pat dry before searing), and finish with a garnish of scallions and toasted sesame seeds.
- Herb Crusted: Mix dried oregano, basil, and garlic powder with your salt and pepper for a Mediterranean flair.
Troubleshooting Common Issues
Why is my fish sticking? Your pan wasn’t hot enough, you didn’t use enough oil, or you tried to move the fish too soon. Remember, heat + fat + patience = release.
Why is the fish curling up? Sometimes the skin or outer fibers contract faster than the flesh. You can gently press down on the fillet with your spatula for the first 30 seconds of cooking to keep it flat.
Serving Suggestions
Pan-seared tilapia is incredibly versatile. For a light, healthy meal, serve it alongside roasted asparagus and quinoa. If you want something heartier, it pairs beautifully with garlic mashed potatoes or a creamy mushroom risotto. The texture of the crispy fish works particularly well with soft sides.
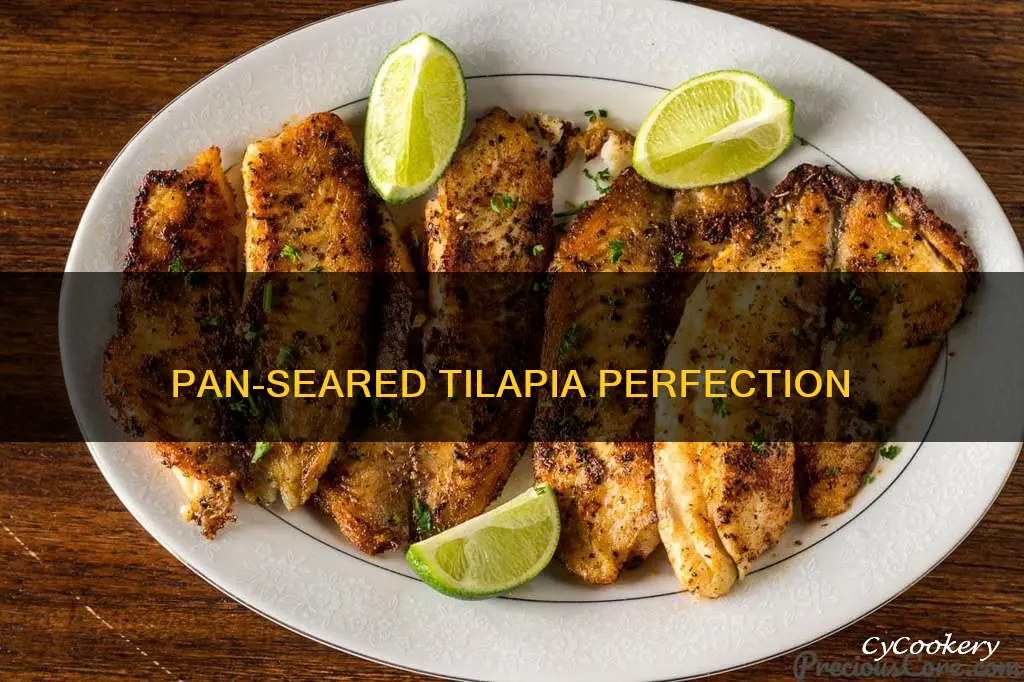
Don’t forget the acid. Fish almost always benefits from a squeeze of fresh lemon or lime juice right before serving. The acidity cuts through the fat and brightens the flavors, making the dish pop.
Conclusion
Cooking pan-seared tilapia doesn’t have to be a gamble. By understanding the importance of moisture control, heat management, and the right equipment, you can turn this humble freezer staple into a gourmet meal. It is a technique that rewards attention to detail.
So, the next time you are at the grocery store, grab some tilapia fillets. Heat up your skillet, trust the process, and enjoy the satisfaction of hearing that perfect sizzle. With these techniques in your culinary toolkit, you are well on your way to mastering seafood at home.