The intimidation factor is real. The shells look impenetrable, the texture can be polarizing, and the safety concerns regarding shellfish are well-known. However, once you understand the basics of selection, handling, and heat application, oysters become one of the fastest and most rewarding ingredients to work with. This guide will walk you through everything you need to know to turn a mesh bag of bivalves into a gourmet feast.
Selecting the Perfect Oysters
Great cooking starts with great ingredients, and with seafood, freshness is not just a preference—it is a safety requirement. When buying oysters, you should ideally visit a reputable fishmonger or a local seafood market. If you are lucky enough to live near the coast, buying direct from the farm is the gold standard. The first test is the visual inspection. The shells should be tightly closed. If you see a shell that is slightly open, tap it gently. If it snaps shut, the oyster is alive and safe to eat. If it remains open, discard it immediately; the oyster is dead and unsafe.
Next, rely on your nose. Fresh oysters should smell like the ocean—clean, briny, and slightly mineral. They should never smell fishy, sour, or like ammonia. Additionally, the oysters should feel heavy for their size. This weight indicates that the shell is full of the oyster’s natural juices, often called the "liquor," which is crucial for keeping the meat plump and flavorful during cooking.
It is also helpful to understand the difference between varieties. East Coast oysters (like Blue Points or Wellfleets) tend to be brinier, saltier, and have smoother shells. West Coast varieties (like Kumamotos or Hama Hama) often have fluted shells and a flavor profile that is sweeter, creamier, and sometimes reminiscent of cucumber or melon. For cooking, larger varieties are generally preferred because they shrink less when exposed to heat, ensuring you still have a substantial bite left after grilling or roasting.
Storage and Safety Basics
Once you get your oysters home, how you store them is critical. Do not store oysters in fresh water or seal them in an airtight plastic bag; this will suffocate and kill them. Instead, place them in a bowl or on a baking sheet, cup-side down (the curved side) to retain their juices. Cover them with a damp cloth or paper towel and place them in the coldest part of your refrigerator. They can stay fresh this way for a few days, but it is always best to cook them within 24 hours of purchase.
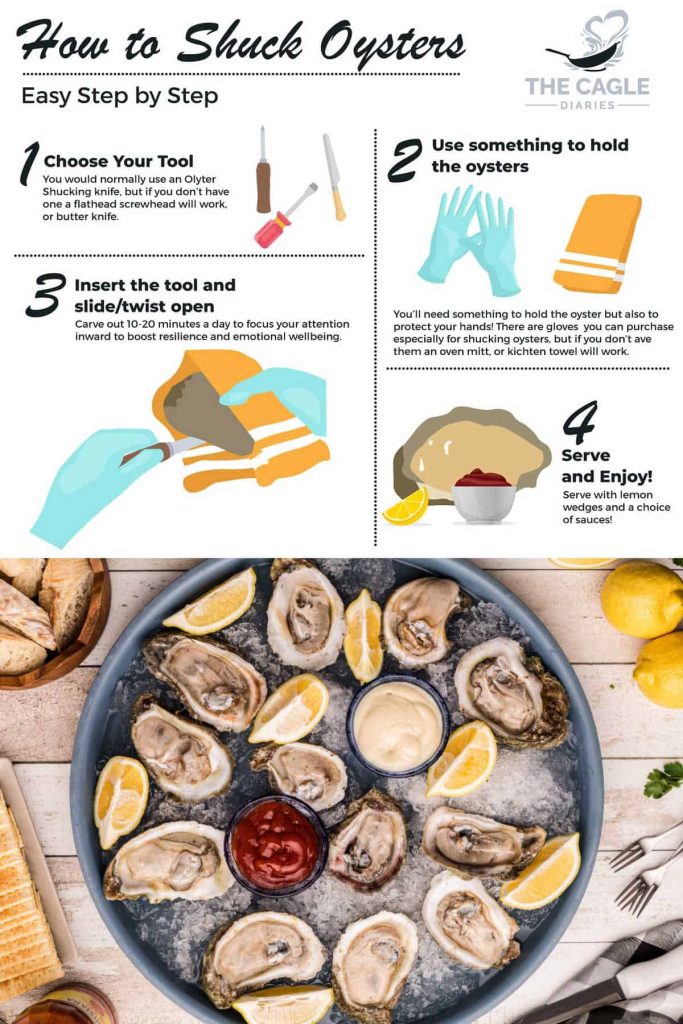
The Art of Shucking
While you can cook oysters whole (which naturally opens the shell), many recipes require you to shuck them first, especially if you plan to grill them on the half-shell or bake them with toppings. Shucking requires patience, the right tool, and safety precautions. You will need an oyster knife—which has a dull edges and a sturdy, pointed tip—and a thick kitchen towel or a cut-resistant glove.
To shuck, fold the towel over the oyster, leaving the hinge (the pointed end where the shells connect) exposed. Place your hand firmly on top of the oyster to hold it steady. Insert the tip of the oyster knife into the hinge. Apply gentle forward pressure and wiggle the knife back and forth like you are turning a doorknob. You aren’t trying to pry it open with brute force; you are looking for the sweet spot where the hinge pops.
Once you feel the "pop," twist the knife to separate the shells. Slide the blade along the top shell to slice through the adductor muscle holding the shell closed. Remove the top shell, being careful not to spill the precious liquor inside. Finally, slide the knife under the meat to sever the bottom muscle, ensuring the oyster slides freely in the shell. Check for any stray bits of shell or grit and wipe them away.
Method 1: Grilling Oysters
Grilling is perhaps the most popular way to cook oysters, imparting a smoky flavor that complements the natural brine perfectly. It is also one of the easiest methods because you don’t necessarily have to shuck them beforehand. There are two main ways to grill: the "pop" method and the half-shell method.
The Pop Method: Preheat your grill to high heat. Scrub the outside of the oyster shells under cold water to remove mud. Place the whole, unopened oysters directly on the grate, cup-side down. Close the lid and let them cook for about 5 to 7 minutes. The steam pressure inside will cause the shells to pop open slightly. Remove them carefully with tongs (they will be extremely hot), pry off the top shell, and serve immediately with melted butter and lemon.
The Half-Shell Method: This is for when you want to add toppings during the cooking process. Shuck the oysters first. Place the oysters on the half-shell on the grill grate. Top them with a compound butter (garlic, parsley, and butter is a classic) or a splash of hot sauce. Grill for about 4 to 5 minutes until the liquid bubbles and the edges of the oyster curl slightly. This method allows the oyster to poach in the butter and its own juices.
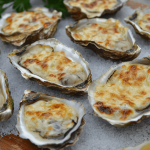
Method 2: Roasting (Oysters Rockefeller Style)
If you don’t have a grill, your oven is an excellent alternative. Roasting oysters is the foundation for the famous Oysters Rockefeller. Preheat your oven to 450°F (230°C). You will need a baking sheet lined with rock salt or crumpled aluminum foil; this creates a stable bed so the curved shells don’t tip over and spill their liquid.
Place your shucked oysters on the prepared baking sheet. For a simple roast, a dot of butter and a sprinkle of parmesan cheese is sufficient. For a richer experience, prepare a mixture of spinach, breadcrumbs, garlic, shallots, butter, and a splash of Pernod or anise liqueur. Top each oyster generously with the mixture.
Bake for 10 to 12 minutes. You are looking for the topping to turn golden brown and the oyster meat to firm up. If the topping isn’t brown enough but the oysters are cooked, switch the oven to "broil" for the last 60 seconds, watching closely to prevent burning. Serve these hot with lemon wedges.
Method 3: Fried Oysters
Fried oysters are a Southern staple, often found in po’boy sandwiches or served as a decadent appetizer. The key to frying oysters is drying them properly and monitoring your oil temperature to ensure a crispy coating without overcooking the delicate meat inside.
Start by shucking the oysters and draining them, but reserve the liquor for another use (like a seafood stock). Pat the oysters dry with paper towels. A wet oyster will cause the breading to slide off. Prepare a three-step dredging station: one bowl with seasoned flour, one with beaten eggs, and one with a mixture of cornmeal and breadcrumbs (or panko for extra crunch).
Heat a neutral oil (like canola or peanut oil) in a deep pot or skillet to 375°F (190°C). Dip the oyster in flour, shake off the excess, dip in egg, and finally coat thoroughly in the cornmeal mixture. Fry in small batches for about 2 to 3 minutes until golden brown. Do not overcrowd the pan, or the oil temperature will drop, resulting in greasy oysters. Drain on a wire rack and serve with remoulade sauce.
Method 4: Traditional Oyster Stew
Oyster stew is a comfort food classic, particularly popular during the holidays. Unlike the other methods where high heat is used, stewing is a gentle process meant to preserve the soft texture of the shellfish. It is essentially a warm milk and cream soup flavored with the oyster liquor.
Drain the oysters, keeping the liquor. Strain the liquor through a fine-mesh sieve or cheesecloth to remove any grit. In a saucepan, melt butter and sauté shallots or celery until soft. Add the oyster liquor and simmer for a minute to concentrate the flavor. Add whole milk and heavy cream (a 50/50 ratio works well) and bring to a gentle simmer—do not let it boil vigorously, or the dairy may curdle.
Add the raw oysters to the hot liquid. Cook them gently for only 2 to 4 minutes. You will know they are done when their edges begin to curl. Season with salt, white pepper, and a dash of cayenne or paprika. Serve immediately with oyster crackers or crusty bread. The result is a soup that tastes like the essence of the ocean wrapped in velvet.
Method 5: Steaming
Steaming is one of the healthiest and purest ways to cook oysters, and it is incredibly easy to do for large crowds. You can use a dedicated steamer pot or simply a large stockpot with a steamer basket insert. Add about two inches of water (or beer/white wine for aromatics) to the bottom of the pot and bring it to a boil.
Place the whole, un-shucked oysters in the steamer basket. Cover the pot tightly. Steam for roughly 5 to 10 minutes. Just like with the grilling "pop" method, you are waiting for the shells to open. Discard any that fail to open after a reasonable time. Serve steamed oysters on a large platter with melted butter and cocktail sauce. This is a very communal way to eat, often done standing around a table with towels and oyster knives handy to fully open the partially popped shells.
Flavor Pairings and Sauces
While cooked oysters are delicious on their own, the right accompaniments elevate the dish. Acid is the oyster’s best friend; it cuts through the richness and salinity. Lemon wedges are mandatory. For a classic raw or lightly steamed application, a Mignonette sauce—made from minced shallots, cracked black pepper, and red wine vinegar—is sophisticated and sharp.
For fried or grilled oysters, creamy sauces work wonders. A homemade tartar sauce or a spicy Remoulade with capers, horseradish, and paprika provides a nice contrast to the crunch. Hot sauce is also a universal pairing; vinegar-based hot sauces (like Tabasco) generally work better than thick, sweet pepper sauces.
When it comes to beverages, think crisp and dry. A Muscadet, Sauvignon Blanc, or a dry Champagne pairs beautifully with the saltiness of the oysters. Conversely, a dark, dry Irish Stout is a classic traditional pairing, particularly with raw or stewed oysters, as the roasted malt notes complement the mineral flavors of the shellfish.
Conclusion
Cooking oysters at home transforms a luxury ingredient into an approachable, fun, and deeply satisfying meal. Whether you choose to wrestle with the shucking knife to prepare a tray of Oysters Rockefeller or simply throw them on the grill for a smoky summer treat, the effort is always worth the reward. The key is to respect the ingredient: buy fresh, keep them cold, and cook them just enough to warm them through without turning them rubbery.
So, the next time you see that bed of ice at the seafood counter, don’t walk past. Grab a dozen, fire up the heat, and enjoy one of the most nutrient-dense and flavorful foods nature has to offer. Happy cooking!