
This complete guide will demystify the process of preparing octopus. Whether you are looking to create a classic Spanish Pulpo a la Gallega, a charred Greek-style grilled octopus, or a refreshing seafood salad, the foundation remains the same. We will walk you through sourcing, cleaning, tenderizing, and cooking this delicacy, ensuring that your next seafood dinner is a resounding success.
Fresh vs. Frozen: Which is Better?
One of the biggest secrets in the culinary world is that frozen octopus is often better than fresh. While this defies the standard logic for most seafood, octopus benefits significantly from the freezing process. The meat of an octopus is dense with fibrous muscle tissue. When the octopus is frozen, the expanding liquids inside the tissues help break down these tough fibers, acting as a natural tenderizer. If you buy fresh octopus, you often have to beat it against a rock (a traditional Greek method) or pound it with a mallet to achieve the same tenderness that freezing accomplishes effortlessly.
If you do choose to buy fresh octopus, look for specimens that smell like the ocean—clean and briny, never fishy or pungent. The eyes should be bright and clear, and the skin should be intact and shiny. However, for the most consistent and tender results, buying a high-quality frozen octopus or freezing a fresh one for at least 24 hours before cooking is highly recommended.
Preparing and Cleaning the Octopus
Before you apply heat, proper preparation is essential. If you have purchased a whole octopus, it may still require cleaning. Thaw frozen octopus in the refrigerator overnight. Once thawed, rinse it thoroughly under cold running water to remove any grit or sand, paying special attention to the suction cups on the tentacles.
Removing the Beak and Ink Sac
If your fishmonger hasn’t already done so, you will need to remove the beak, eyes, and ink sac. The beak is a hard, parrot-like structure located in the center of the tentacles. You can push it out by squeezing the area or using a small paring knife to cut it away. Next, locate the eyes on the head sac and carefully cut them out. Finally, turn the head (mantle) inside out to remove the viscera and the ink sac. Rinse the cavity thoroughly once emptied.
The Science of Tenderizing: How to Avoid the Rubber
The goal when cooking octopus is to break down collagen. Collagen is the connective tissue that makes the meat tough. Unlike a steak that might get tough if overcooked, octopus follows a different curve: it starts raw, becomes tough and rubbery as it heats up, and then eventually becomes tender again as the collagen gelatinizes after prolonged cooking. The sweet spot is a slow simmer that allows this breakdown to happen without drying out the meat.
There are many myths surrounding how to tenderize octopus. You may have heard of adding wine corks to the boiling water, adding vinegar, or massaging it with salt. While vinegar can help flavor the broth and slight acidity aids in breaking down fibers, the wine cork method is largely an urban legend with no scientific backing. The true secret to tenderness is simply patience and temperature control.
Method 1: The Classic Simmer (Boiling)
This is the most common and reliable method for cooking octopus. Even if you plan to grill or sear the octopus later, you almost always need to braise or boil it first to tenderize the meat.
- Prepare the Pot: Fill a large stockpot with water. You don’t need a huge amount of water; the octopus will release its own liquid. Add aromatics such as a halved onion, a few cloves of garlic, a bay leaf, whole peppercorns, and a splash of white wine or vinegar. Do not add salt yet, as it can toughen the meat and concentrate too much as the water reduces.
- The “Scare” Technique: Once the water is boiling, hold the octopus by the head. Dip the tentacles into the boiling water for 2-3 seconds, then lift it out. Repeat this process three times. You will see the tentacles curl up beautifully. This technique, known as “scaring” the octopus, helps the skin remain intact and gives the tentacles an aesthetic curl.
- The Simmer: Submerge the entire octopus in the water. Reduce the heat immediately to a very low simmer. It is crucial that the water does not boil violently, as high agitation can rip the skin off.
- Cooking Time: Cover the pot and let it simmer. The general rule of thumb is about 45 to 60 minutes for a 2-3 pound octopus. Larger specimens may take up to 90 minutes.
- The Toothpick Test: To check for doneness, insert a toothpick or a sharp knife into the thickest part of a tentacle near the head. If it slides in with little to no resistance (like a hot knife through butter), it is done.
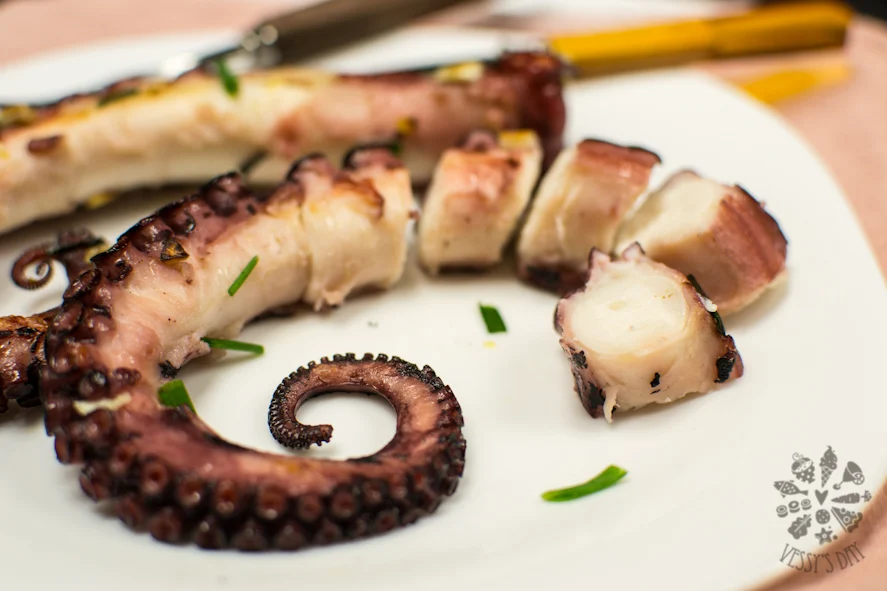
Method 2: Grilled Octopus (Char and Smoke)
Grilled octopus is a staple of Mediterranean cuisine, offering a delightful contrast between the smoky, crispy exterior and the creamy, tender interior. However, you cannot throw raw octopus directly onto a grill; it will be inedible. Grilling is a finishing step.
After you have boiled the octopus using the method above, let it cool in its own juices. This allows the meat to reabsorb moisture. Once cooled, cut the tentacles individually from the head. Brush them generously with olive oil and season with oregano or thyme.
Preheat your grill to high heat. You want a quick sear, not a long cook time. Place the tentacles on the hottest part of the grill. Cook for just 2-3 minutes per side until you achieve a nice char and crispy suckers. Remove from the heat, drizzle with fresh lemon juice, extra virgin olive oil, and a sprinkle of sea salt.
Method 3: Sous Vide Octopus
For those who demand precision, the sous vide method guarantees perfection. By cooking the octopus in a vacuum-sealed bag at a precise temperature, you retain all the juices and flavor that usually escape into the boiling water.
Set your sous vide water bath to 170°F (77°C) or 180°F (82°C). Season the cleaned octopus with olive oil and aromatics, seal it in a bag, and cook for 4 to 5 hours. The result is an incredibly tender texture that retains the pure flavor of the sea. Finish by searing in a hot cast-iron skillet or on the grill.
Serving Suggestions and Flavor Pairings
- Galician Style (Pulpo a la Gallega): Slice boiled octopus into medallions with kitchen shears. Arrange on a wooden board over sliced boiled potatoes. Drizzle heavily with high-quality olive oil and sprinkle generously with sweet Spanish paprika (pimentón) and coarse sea salt.
- Mediterranean Salad: Toss cooled, chopped octopus with celery, red onion, parsley, lemon juice, and olive oil. This makes for a refreshing summer appetizer.
- Asian Fusion: Glaze grilled octopus with a mixture of soy sauce, ginger, sesame oil, and chili paste for a savory, umami-packed dish.
Common Mistakes to Avoid
1. Boiling at High Heat
Boiling the octopus vigorously will cause the muscle fibers to tighten rapidly, resulting in a tough texture. It can also cause the delicate purple skin to slough off, leaving the meat looking unappealing. Always maintain a gentle simmer.
2. Cutting Before Resting
Just like a steak, octopus needs to rest. If you cut it immediately after boiling, moisture will evaporate, and the meat can become dry. Ideally, let the octopus cool in the cooking liquid (pot liquor) until it reaches room temperature.
3. Peeling the Skin
Some people feel the urge to peel the gelatinous skin off the tentacles. Unless the skin is damaged or you have a specific textural preference, keep it on. The skin holds a tremendous amount of flavor and helps keep the meat moist during grilling or searing.
Nutritional Benefits of Octopus
Beyond its delicious taste, octopus is a nutritional powerhouse. It is a lean source of protein, making it excellent for low-fat diets. It is particularly rich in Vitamin B12, which is essential for metabolism and red blood cell formation. Additionally, octopus provides significant amounts of selenium, iron, and zinc. However, it is naturally high in cholesterol, so it should be consumed in balance with a healthy diet.
Frequently Asked Questions (FAQ)
Q: Why did my octopus turn purple?
The purple color comes from the skin releasing its pigments during the cooking process. This is completely natural and desirable, as it gives the cooking liquid a rich color and flavor.
Q: Can I use a pressure cooker?
Yes! A pressure cooker or Instant Pot can significantly reduce cooking time. Cook on high pressure for about 15-20 minutes, then allow a natural release. Be careful not to overcook it, as it can become mushy.
Q: How do I store leftover octopus?
Cooked octopus can be stored in an airtight container in the refrigerator for up to 3 days. It can also be frozen for up to 3 months. To reheat, gently sauté it in a pan; microwaving is not recommended as it can make the texture rubbery.
Conclusion
Cooking octopus at home does not have to be an intimidating task. By understanding the importance of a slow simmer and proper preparation, you can transform this humble seafood ingredient into a spectacular meal. Whether you choose to serve it simply with paprika and oil or char it on a grill for a smoky summer dinner, the effort is well worth the reward. Embrace the process, experiment with different aromatics, and enjoy the delicate, savory flavor of perfectly cooked octopus.
