Despite its somewhat alien appearance, cleaning squid is a surprisingly straightforward process once you understand the mechanics. Mastering this skill not only saves you money—as whole squid is often significantly cheaper than pre-cleaned tubes or rings—but also ensures a fresher, superior product. Pre-cleaned squid has often been processed and frozen, which can sometimes compromise the delicate texture. By learning Langkah Mudah Membersihkan Cumi (easy steps to clean squid), you unlock the potential for restaurant-quality seafood dishes right in your own kitchen.
In this comprehensive guide, we will walk you through every stage of the process. We will cover how to select the freshest catch at the market, the tools you will need, a detailed step-by-step breakdown of the cleaning process, and various cutting techniques suited for different culinary applications. Whether you are planning a grill, a fry, or a slow braise, proper preparation is the foundation of a successful dish.
Selecting the Freshest Squid
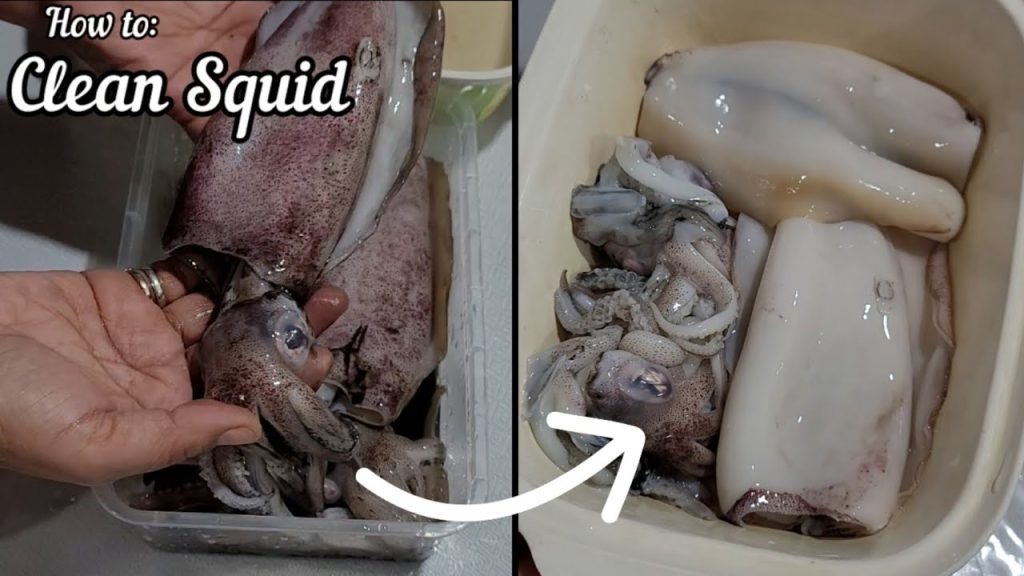
Before you even pick up a knife, the quality of your dish is determined at the fishmonger’s counter. Knowing how to identify fresh squid is crucial. Unlike fish, squid does not have a strong ‘fishy’ odor when fresh. Instead, it should smell like the ocean—clean, briny, and slightly sweet. If you detect a pungent, ammonia-like scent, the squid is past its prime and should be avoided.
Visually, look for squid with clear, bright eyes. Cloudy or sunken eyes are a sign of age. The skin should be spotted with purple and brown hues and should appear moist and shiny. Avoid squid that looks dull, matte, or has skin that is tearing away from the flesh excessively. When you touch the body (the tube), it should feel firm and elastic. If it feels mushy or slimy, it is not fresh.
Size also matters depending on your intended cooking method. Smaller squid tend to be more tender and are excellent for quick frying or grilling whole. Larger squid have thicker flesh which can be delicious, but they often require either very quick cooking or a long, slow braise to break down the connective tissue and prevent rubberiness.
Essential Tools for Preparation
You do not need an arsenal of expensive equipment to clean squid. The process is tactile and mostly done by hand. However, having a few key items ready will streamline the workflow. You will need a sharp chef’s knife or a paring knife for precision cuts. A sturdy cutting board is essential; plastic is often preferred for seafood to ensure easy sanitization afterwards.
Access to running cold water is non-negotiable. You will be rinsing the squid frequently throughout the process to wash away sand, ink, and viscera. Additionally, having a bowl of ice water nearby is a professional tip; keeping the cleaned squid cold while you work on the rest of the batch preserves its texture and freshness.
Step 1: Separating the Head from the Body
The first step in the cleaning process involves separating the tentacles and head from the main body tube (mantle). Hold the body of the squid firmly in one hand. With your other hand, grasp the head just above the eyes and the tentacles. Gently but firmly pull the head away from the body.
Usually, the internal organs (viscera) will come out along with the head. Do not jerk or yank the head, as this might cause the ink sac to burst inside the tube, which can be messy to clean. A steady, twisting pulling motion works best. If the innards detach and remain inside the tube, don’t worry—we will remove them in a later step.
Step 2: Removing the Quill (The Pen)
Inside the body tube, you will find a transparent, plastic-like shard known as the quill or the pen. This is the vestigial shell of the squid. It acts as a backbone, keeping the squid’s shape. You must remove this as it is inedible and feels like hard plastic.
To remove it, feel for the hard edge of the quill along the inside of the tube. Grasp it firmly with your fingers and pull it out. It should slide out relatively easily. Sometimes it may break; if it does, ensure you reach back in to retrieve any remaining fragments. The quill can be discarded.
Step 3: Cleaning the Interior of the Tube
Even after removing the head and the quill, there may be residual viscera or gunk left inside the tube. Using the back of your knife or your fingers, push from the tapered end of the tube toward the opening to squeeze out any remaining matter. Alternatively, you can reach inside with your fingers to scrape it clean.
Rinse the inside of the tube thoroughly under cold running water. Ensure all sand and slimy residue are washed away. Some chefs prefer to turn the tube inside out to ensure it is perfectly clean, though this is not strictly necessary if you rinse it well. Once clean, set the tube aside in your bowl of ice water.
Step 4: Removing the Skin (Optional)
The outer skin of the squid is edible, but many recipes call for its removal for aesthetic reasons. The skin turns a dark purple-grey when cooked, which can discolor white sauces or soups. For purely white calamari rings, you will want to peel the skin.
To peel the squid, find a loose edge of the spotted skin at the opening of the tube. Grasp it and pull it downward toward the tail. It usually peels off in large sheets. If you are having trouble gripping it, using a dry paper towel can provide the necessary traction. Rinse the white tube once the skin is removed.
Note that for rustic stews or grilled dishes, leaving the skin on can add a depth of flavor and a beautiful color contrast. It is entirely a matter of preference and the specific requirements of the dish you are preparing.
Step 5: Removing the Fins
The fins, or wings, are located on the side of the body tube. They are edible and have the same flavor as the body, though the texture is slightly firmer. During the peeling process, the fins often come off with the skin. If you wish to keep them, you must carefully separate them from the skin.
You can cook the fins along with the rings, or mince them to use in stuffings. If you are aiming for perfect, uniform rings for deep frying, you might choose to trim the fins off to make the tube perfectly cylindrical. Do not throw them away; they are excellent in seafood chowders.
Step 6: Preparing the Tentacles
The tentacles are often the most flavorful part of the squid and should definitely be saved. However, they require some trimming. First, you need to separate the tentacles from the head and the organs. Cut just below the eyes of the squid, separating the ring of tentacles from the head. Discard the head and innards.
If the beak is stubborn, you can make a small incision with your knife to help release it. Once the beak is removed, rinse the tentacles thoroughly under cold water, paying attention to the suction cups, which can sometimes hold sand or grit. Rubbing them gently under water usually suffices to clean them.
Handling the Ink Sac
If you are feeling adventurous, you can harvest the squid ink. The ink sac is a small, silver-black pouch located in the viscera that you pulled out with the head. Squid ink adds a rich, briny depth to pastas and risottos (creating dishes like Pasta al Nero di Seppia).
To harvest it, carefully locate the sac and gently pull it away from the other organs without puncturing it. punctures. You can then puncture it yourself over a small bowl with a tablespoon of water or vinegar to dilute it slightly. Be warned: squid ink stains everything it touches, including clothes and porous countertops, so proceed with caution.
Cutting Techniques: Calamari Rings
The most popular way to prepare squid is cutting the tube into rings. This is ideal for deep-fried calamari or braised dishes. Lay the cleaned tube flat on the cutting board. Using a sharp knife, slice the tube crosswise into rings of your desired width.
For frying, rings that are about 1 centimeter wide are standard. If they are too thin, they will overcook quickly; if they are too thick, they may be chewy. Ensure the cuts are even to guarantee uniform cooking time.
Cutting Techniques: Scoring (Pineapple Cut)
For stir-fries, especially in Asian cuisine, scoring the squid is a popular technique. This not only looks beautiful—causing the squid to curl up into attractive shapes—but also increases the surface area for sauce absorption and allows for very fast cooking.
To do this, split the tube open so it lies flat as a single sheet. With the inside of the squid facing up, use your knife to make shallow diagonal cuts across the surface, being careful not to cut all the way through the flesh. Then, make diagonal cuts in the opposite direction to create a diamond or cross-hatch pattern. When cut into bite-sized pieces and blanched or stir-fried, the squid will curl into a flower or pineapple shape.
Cutting Techniques: Tubes for Stuffing
If you intend to make stuffed squid, your preparation is even simpler. Once the quill and viscera are removed, leave the tube whole. Do not slice it. You can stuff the cavity with a mixture of breadcrumbs, herbs, garlic, and the minced tentacles, then secure the opening with a toothpick before braising in tomato sauce or grilling.
Dealing with Odor
While fresh squid shouldn’t smell fishy, some people are sensitive to the natural scent of seafood. To neutralize any lingering odors and tenderize the flesh, you can soak the cleaned squid in milk for about 20 to 30 minutes before cooking. The lactic acid helps break down fibers, and the milk absorbs odors.
Alternatively, a squeeze of lemon juice or a splash of vinegar in the rinsing water can help freshen the squid. However, do not let it soak in acid for too long (like lime or lemon juice) before cooking, as the acid will begin to ‘cook’ the protein (like ceviche) and can toughen the texture if left too long.
The Science of Cooking Squid
Squid has a reputation for being rubbery, but this is almost always a result of improper cooking times. Squid muscle fibers are very dense and reinforced with connective tissue. To keep it tender, you must follow the rule of ‘Fast and Hot’ or ‘Low and Slow’.
Fast and Hot: Cook the squid for less than 2 to 3 minutes on high heat. This includes deep-frying, grilling, or searing. The meat cooks rapidly, and if you remove it from the heat just as it turns opaque, it will remain tender and snappy.
Low and Slow: If you miss the short window, the collagen tightens, and the squid becomes tough. At this point, you must continue cooking for at least 30 to 45 minutes (braising or stewing). This prolonged heat breaks down the collagen into gelatin, rendering the squid fork-tender once again. Anything in between these two timeframes usually results in a chewy, rubbery texture.
Storage Tips
Freshly cleaned squid is highly perishable. It is best cooked the same day it is purchased. If you must store it, place the cleaned squid in a sealed container buried in ice or in the coldest part of your refrigerator. It should be used within 24 hours.
Squid also freezes remarkably well. If you have bought in bulk, clean the squid thoroughly, pat it dry to prevent ice crystals from forming, and place it in airtight freezer bags. Remove as much air as possible (vacuum sealing is best). Frozen squid can last for up to two months without significant loss of quality. Thaw it slowly in the refrigerator overnight before using.
Conclusion
Cleaning squid at home is a rewarding skill that connects you closer to your food. While the first attempt might feel slippery and slightly messy, the process quickly becomes intuitive. By following these steps—removing the head, quill, and beak, and cleaning the tube—you ensure a pristine base for your culinary creations.
Whether you are making a classic Cumi Goreng Tepung (crispy fried squid), a spicy sambal squid, or a delicate Italian seafood salad, the effort you put into properly cleaning and preparing the squid will be evident in every bite. Fresh, well-prepared squid is sweet, tender, and undeniably delicious, far surpassing the quality of pre-processed alternatives.