Seafood Onigiri elevates this humble rice ball into a gourmet treat. Imagine tender, seasoned rice encasing succulent fillings like flaky salmon, creamy tuna, or spicy scallops, all wrapped in a crisp sheet of nori seaweed. It’s a portable, nutritious, and incredibly satisfying meal or snack, perfect for bento boxes, picnics, or a quick bite on the go. This comprehensive guide will walk you through every step, from selecting the right rice to mastering the art of shaping and filling, ensuring your homemade seafood Onigiri is nothing short of perfection.
At the heart of any great Onigiri lies the rice. The choice of rice is paramount, as it dictates the texture and overall mouthfeel of your Nasi Kepal. For authentic Japanese Onigiri, short-grain Japanese rice, often labeled as sushi rice, is indispensable. Its unique characteristics—a slightly sticky texture when cooked, a subtle sweetness, and a firm yet tender bite—make it ideal for shaping without falling apart.
Unlike long-grain or medium-grain varieties, Japanese short-grain rice possesses a higher starch content, particularly amylopectin, which is responsible for its characteristic stickiness. This stickiness is crucial for allowing the rice grains to adhere to each other, forming a cohesive ball or triangle that can hold its shape even with a savory filling inside. Do not be tempted to substitute with other rice types, as the results will be significantly different in texture and handling.
Another indispensable component of seafood Onigiri is nori, the dried edible seaweed sheet. Nori not only adds a distinct umami flavor and a pleasant crispness but also serves a practical purpose: it provides a clean, convenient way to hold the rice ball without getting your hands sticky. High-quality nori should be dark green, crisp, and have a slightly roasted aroma. Avoid nori that appears dull, brittle, or has a fishy odor, as these indicate poor quality or age.
Before diving into the cooking process, ensure you have the necessary kitchen equipment. While Onigiri making can be minimalist, a few tools will make the process smoother and more enjoyable. You’ll definitely need a rice cooker for perfectly cooked rice, or a heavy-bottomed pot with a tight-fitting lid if cooking on the stovetop. A large mixing bowl for seasoning the rice and a clean, damp cloth or paper towels are also essential.
For shaping, your hands are the primary tools, but plastic wrap (cling film) is highly recommended for hygiene and ease of handling. For those seeking perfectly uniform shapes, Onigiri molds are readily available and can be a great investment, especially when making large batches. A sharp knife might be needed for preparing certain fillings, and a small bowl of salted water will be useful for moistening your hands.
The journey to perfect Onigiri begins with proper rice preparation. Start by measuring your desired amount of short-grain Japanese rice. Place the rice in a large bowl and rinse it thoroughly under cold running water. Use your hands to gently swirl and massage the rice, changing the water several times until it runs clear. This process removes excess starch, which helps prevent the rice from becoming overly sticky or gummy.
After rinsing, it’s crucial to allow the rice to soak. Transfer the rinsed rice to your rice cooker pot or cooking pot and add the appropriate amount of cold water according to your rice cooker’s instructions or a 1:1 ratio for stovetop cooking (e.g., 2 cups rice to 2 cups water). Let the rice soak for at least 30 minutes, or up to an hour. Soaking allows the rice grains to absorb water evenly, leading to a more tender and uniformly cooked result.
Once soaked, cook the rice. If using a rice cooker, simply select the ‘white rice’ setting and let it do its magic. If cooking on the stovetop, bring the rice and water to a boil over high heat. Once boiling, reduce the heat to the lowest setting, cover the pot tightly, and simmer for about 15-20 minutes, or until all the water has been absorbed. Do not lift the lid during this time.
After cooking, turn off the heat and let the rice rest, covered, for another 10-15 minutes. This steaming period allows the residual steam to finish cooking the rice and makes it fluffier. Finally, transfer the hot rice to a large, wide mixing bowl. Using a rice paddle or a flat wooden spoon, gently ‘cut’ through the rice in a slicing motion, then fold it over. This aerates the rice and helps it cool slightly without becoming mushy.
Now, it’s time to season the rice. While sushi rice typically uses a vinegar mixture, Onigiri rice often requires a simpler seasoning: a pinch of salt. Sprinkle a moderate amount of fine sea salt over the warm rice and continue to gently mix and fold it. The salt enhances the natural sweetness of the rice and provides a foundational flavor that complements the seafood fillings. Taste a small amount and adjust if necessary. The rice should be warm, not hot, when shaping.
With the rice ready, let’s turn our attention to the star of the show: the seafood fillings. One of the most classic and universally loved seafood Onigiri fillings is Tuna Mayo. For this, drain a can of good quality tuna (in water or oil) very well. In a bowl, flake the tuna and mix it with Japanese mayonnaise (which is richer and tangier than Western mayo), a dash of soy sauce, and a pinch of black pepper. Some prefer to add a touch of sriracha for a spicy kick or finely chopped scallions for freshness.
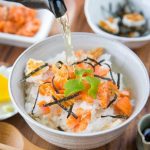
Another incredibly popular option is Grilled Salmon. You can grill or bake a salmon fillet until cooked through, then let it cool slightly. Flake the salmon meat with a fork, removing any skin and bones. Season the flaked salmon with a pinch of salt, a drizzle of soy sauce, and a sprinkle of sesame seeds. The rich, savory flavor of salmon pairs wonderfully with the seasoned rice.
For a more indulgent treat, consider Shrimp Tempura Onigiri. Prepare or purchase pre-made shrimp tempura. Once cooled, cut the tempura into bite-sized pieces. You can mix these pieces with a little bit of Japanese mayo or a drizzle of sweet chili sauce for added flavor and moisture. The crispy texture of the tempura, even when slightly softened by the rice, offers a delightful contrast.
Crab Stick Salad offers a light and refreshing option. Shred imitation crab sticks (surimi) and mix them with Japanese mayonnaise, a squeeze of lemon juice, and optionally, some finely chopped cucumber or corn. This filling is quick to prepare and has a pleasant, slightly sweet and savory profile that appeals to many.
For those who enjoy a bit of heat and sophistication, Spicy Scallop or Spicy Tuna fillings are excellent choices. For scallops, lightly sear them, chop finely, and mix with mayonnaise and sriracha. For spicy tuna, combine flaked tuna with mayo, sriracha, and a touch of sesame oil. These fillings bring a vibrant flavor and a pleasant warmth to your Onigiri.
Now comes the fun part: assembling your Onigiri! There are two primary methods: by hand or using a mold. Regardless of the method, always have a small bowl of salted water nearby to moisten your hands (if shaping by hand) or dampen the mold to prevent sticking. The salt on your hands also seasons the outer layer of rice, adding to the flavor.
If shaping by hand, lay a piece of plastic wrap on your work surface. Place about half a cup of seasoned rice in the center of the plastic wrap. Gently flatten the rice into a disc, creating a slight indentation in the middle. Place a generous spoonful of your chosen seafood filling into this indentation. Then, gather the edges of the plastic wrap to bring the rice up and over the filling, encasing it completely.
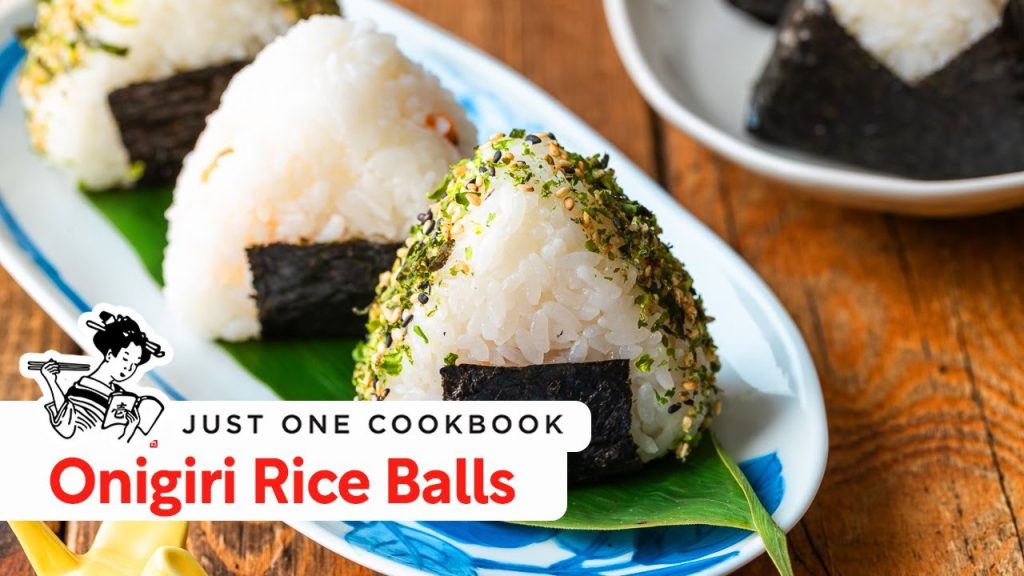
With the rice and filling securely wrapped in plastic, gently begin to shape your Onigiri. The most common shapes are triangles, balls, and cylinders. For a triangle, gently press the rice from three sides using your palms and fingers, rotating the ball to create distinct edges. For a ball, simply cup your hands around the rice and gently squeeze and rotate until a round shape forms. Be firm enough to compress the rice, but gentle enough not to crush the grains.
If using an Onigiri mold, lightly dampen the inside of the mold with water. Place about half the rice needed for one Onigiri into the bottom of the mold, pressing it gently to form a base. Create a small well in the center, add your filling, then top with the remaining rice. Close the mold tightly and press down firmly to compact the rice and form the desired shape. This method ensures consistent size and shape, which is great for presentation.
Once shaped, it’s time to add the nori. Take a sheet of nori and, if it’s a large sheet, cut it into strips or a rectangular piece that will fit around the base or side of your Onigiri. Place the Onigiri on the nori, pressing gently to adhere it. The natural moisture of the rice will help the nori stick. You can wrap it partially around the base, vertically, or even wrap the entire Onigiri for full coverage.
Here are some pro tips for achieving perfectly delicious Onigiri. Firstly, don’t overpack the rice. While you need to compress it enough to hold its shape, excessive pressure will result in a hard, unappetizing rice ball. Aim for a texture that is firm yet still tender and slightly yielding when bitten.
Secondly, keep your hands moist and salted. This prevents the rice from sticking to your hands during shaping and adds a subtle seasoning to the outer layer of the rice, enhancing the overall flavor. Re-moisten your hands as needed.
Thirdly, use fresh, crisp nori. Nori can quickly absorb moisture from the air and become soft or chewy. For the best experience, wrap the Onigiri just before serving, or store the nori separately and attach it right before eating. Some commercially prepared Onigiri uses special packaging that keeps the nori separate until the moment of consumption.
Fourthly, ensure your filling is not too wet. Excess moisture from the filling can make the rice soggy and cause the Onigiri to fall apart. Drain canned ingredients thoroughly and allow cooked seafood to cool and dry slightly before incorporating it into your Onigiri.
Beyond the classic fillings, feel free to get creative! Consider adding finely diced avocado, cucumber, or even a sprinkle of toasted sesame seeds to your seafood fillings for added texture and flavor. A drizzle of unagi sauce (eel sauce) or a touch of Japanese seven-spice blend (shichimi togarashi) can elevate the taste profile.
For a delightful twist, try making Yaki Onigiri (Grilled Onigiri). After shaping your Onigiri, brush the surfaces lightly with soy sauce or a mixture of soy sauce and mirin. Grill them in a pan or under a broiler until the exterior is slightly crispy and golden brown, developing a wonderful caramelized crust. This adds an extra layer of flavor and texture.
Seafood Onigiri is incredibly versatile for serving. It’s a staple in Japanese lunchboxes (bento), a perfect grab-and-go snack, or a light meal. Pack them for picnics, road trips, or simply enjoy them as a satisfying treat at home. They pair wonderfully with a side of miso soup, a fresh salad, or a cup of green tea.
From a nutritional standpoint, seafood Onigiri offers a balanced meal. The rice provides complex carbohydrates for sustained energy, while the seafood fillings are excellent sources of lean protein and essential nutrients. Many types of seafood, especially salmon and tuna, are rich in Omega-3 fatty acids, which are beneficial for heart health and brain function.
The nori contributes vitamins (A, C, E, K), minerals (iodine, calcium, iron), and dietary fiber. When combined with fresh, high-quality ingredients, seafood Onigiri can be a healthy and fulfilling option that supports an active lifestyle.
While making Onigiri is generally straightforward, a few common mistakes can hinder your success. One major pitfall is using rice that is too hot or too cold. Rice should be warm enough to be pliable but cool enough to handle comfortably. If it’s too hot, it will be difficult to shape; if it’s too cold, it will be dry and crumbly.
Another mistake is using too much filling, which can make the Onigiri difficult to close and prone to breaking apart. Aim for a balanced ratio of rice to filling. Conversely, too little filling will result in a bland Onigiri. Practice will help you find the sweet spot.
Regarding storage, Onigiri is best enjoyed fresh, ideally within a few hours of preparation. The rice can harden and the nori can become soggy if stored improperly. If you need to store them for a short period (e.g., for a lunchbox), keep them at room temperature in an airtight container for up to 4-6 hours.
Refrigerating Onigiri is generally not recommended as the cold temperature can cause the rice to become hard and lose its desirable texture. However, if refrigeration is necessary for food safety (e.g., if the filling is highly perishable and it’s a warm day), wrap each Onigiri tightly in plastic wrap before placing it in an airtight container in the fridge. Allow it to come to room temperature before eating for a slightly better texture.
For longer storage, you can freeze Onigiri. Wrap each Onigiri tightly in plastic wrap, then place them in a freezer-safe bag. They can be frozen for up to one month. To reheat, remove the plastic wrap and microwave on low heat until warmed through, or steam them. Be aware that the texture may not be exactly the same as freshly made.
Onigiri holds a special place in Japanese culture, dating back centuries as a convenient meal for travelers, samurai, and farmers. Its enduring popularity stems from its simplicity, versatility, and ability to be customized to individual tastes. Making Onigiri is not just cooking; it’s an embrace of a cherished culinary tradition.
Armed with this comprehensive guide, you are now ready to embark on your own Onigiri-making adventure. Experiment with different seafood combinations, seasonings, and shaping techniques to discover your personal favorites. The joy of crafting these delicious Japanese rice balls (Nasi Kepal) and sharing them with loved ones is an experience in itself. Happy cooking, and enjoy your homemade seafood Onigiri!
Whether you are a seasoned home cook or a culinary novice, the process of making seafood Onigiri is both rewarding and delicious. It’s a fantastic way to explore Japanese cuisine in your own kitchen, offering endless possibilities for customization and flavor exploration. So gather your ingredients, prepare your workspace, and get ready to create some truly memorable rice balls.