This comprehensive guide aims to demystify the process of preparing green mussels, transforming what can be a daunting task into a simple, enjoyable culinary adventure. We will delve into the root causes of these issues and provide a step-by-step methodology, along with advanced techniques, to ensure your green mussels are always perfectly clean, delightfully fragrant, and utterly delicious.
Beyond their exquisite taste, green mussels offer significant nutritional benefits. They are an excellent source of lean protein, essential Omega-3 fatty acids, and a rich array of vitamins and minerals, including iron, zinc, selenium, and B12. Incorporating them into your diet can contribute to heart health, improved immunity, and overall well-being, making the effort to prepare them correctly even more rewarding.
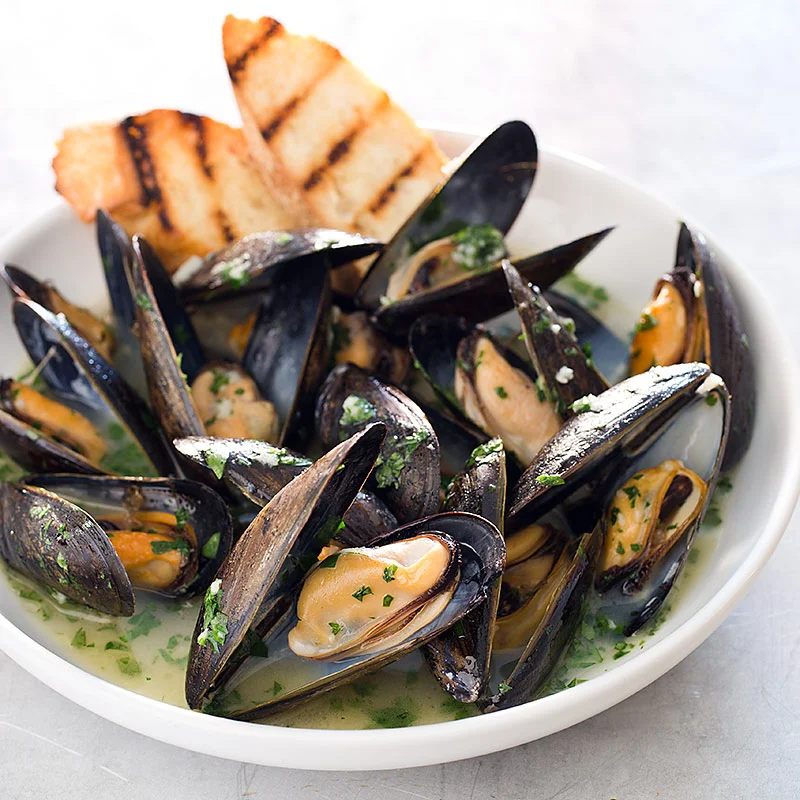
The allure of fresh, perfectly prepared seafood is undeniable. Imagine indulging in a bowl of perfectly steamed mussels, bathed in a fragrant sauce, each bite offering a pure taste of the ocean without any unpleasant surprises. This guide is your passport to achieving that culinary perfection in your own kitchen.
Understanding the challenges is the first step towards overcoming them. The ‘fishy’ odor commonly associated with seafood, including mussels, is primarily caused by a compound called trimethylamine (TMA). Fresh seafood contains trimethylamine oxide (TMAO), which is largely odorless. However, as seafood ages or is improperly handled, bacteria break down TMAO into TMA, which has that distinct, strong fishy smell. Proper cleaning and freshness are key to minimizing this.
The gritty texture often encountered in mussels is due to sand and silt. Mussels are filter feeders, meaning they draw in large volumes of water, filtering out plankton and other microscopic organisms for sustenance. In doing so, they also ingest sand, mud, and other particulate matter from their environment. If not properly purged, these impurities remain within the mussel, leading to an unpleasant eating experience.
The importance of freshness cannot be overstated when it comes to preparing green mussels. Always select mussels that are alive and healthy. Look for shells that are tightly closed. If any mussels are slightly open, tap them gently; they should close immediately. Discard any mussels that remain open after tapping, have cracked or broken shells, or emit a strong, unpleasant odor, as these are likely dead or spoiled.
Before embarking on the cleaning process, ensure you have the necessary tools at hand. A stiff-bristled brush (a vegetable brush works well), several large bowls, a colander, and potentially a small paring knife or a sturdy spoon will be invaluable. Having everything organized will make the process more efficient and enjoyable.
The initial inspection is crucial. Carefully go through your batch of mussels, visually checking each one. As mentioned, discard any mussels that are open and do not close when tapped, or those with damaged shells. These mussels are compromised and could potentially harbor bacteria, affecting the safety and flavor of your entire dish.
The first major step to eliminating sand is the depuration process, or soaking. This technique encourages the mussels to filter clean water and expel any sand, grit, and impurities they have ingested. This process is essential and should never be skipped for optimal results.
For depuration, use cold, fresh water. Tap water is generally acceptable, but if your tap water has a strong chlorine smell, let it sit for 30 minutes to an hour to allow the chlorine to dissipate, or use filtered water. Avoid using warm or hot water, as this can shock the mussels and cause them to die.
While plain fresh water works, adding a touch of salt can enhance the depuration process. Mussels live in saltwater, and a slightly saline environment encourages them to open and filter more actively. Add about 1-2 tablespoons of salt per liter of water. Ensure the salt is fully dissolved before adding the mussels.
A traditional and highly effective trick to encourage mussels to purge sand is to add a small amount of starch to the soaking water. Flour, cornmeal, or even oatmeal can be used. The mussels will filter these fine particles, and in doing so, expel the sand and grit from their digestive systems. Add about 1-2 tablespoons of flour or cornmeal per liter of water.
Another intriguing traditional method, particularly common in some Asian cuisines, involves adding a few dried red chilies to the soaking water. The mild irritant from the chilies is believed to stimulate the mussels to purge their contents more aggressively. Use sparingly, perhaps 2-3 dried chilies for a large bowl of mussels, and ensure they are whole.
The depuration process typically requires a minimum of 1-2 hours, but for heavily soiled mussels, it’s advisable to soak them for 3-4 hours, or even up to 6 hours. During this time, it’s crucial to change the water every hour or so. You’ll notice the water becoming cloudy with expelled sand and debris, signaling that the process is working effectively.
Once the soaking is complete, it’s time for the physical cleaning of the shells. Using a stiff-bristled brush, vigorously scrub each mussel under cold running water. Pay close attention to removing any barnacles, algae, mud, or other debris clinging to the shell surface. This not only makes them more appealing but also removes external impurities.
The ‘beard’ of the mussel refers to the byssal threads, which are strong, fibrous strands that the mussel uses to attach itself to surfaces. These threads are inedible and should be removed. To debeard a mussel, grasp the beard firmly near where it emerges from the shell and pull it towards the hinge end of the mussel with a strong, sharp tug. If it’s stubborn, a quick twist can help. Do this just before cooking, as removing the beard too early can kill the mussel.
After scrubbing and debearding, give the mussels a final, thorough rinse under cold running water. Place them in a colander and rinse until the water running off them is completely clear. This step ensures that any lingering sand or debris from the scrubbing process is washed away, leaving you with pristine mussels.
Even after thorough cleaning, some individuals might still be sensitive to a faint fishy note. For an extra layer of odor elimination, citrus fruits are your best friends. A squeeze of fresh lemon or lime juice over the mussels just before cooking, or even a brief soak (5-10 minutes) in water with lemon slices, can work wonders. The acidity helps to neutralize the alkaline TMA compounds responsible for the fishy smell.
Ginger is another powerful ally against fishy odors. Its pungent, aromatic compounds not only mask but also help to neutralize unwanted smells. Slicing fresh ginger and adding it to your cooking liquid (e.g., steaming water, broth) or sautéing it with the mussels can infuse them with a delightful warmth and effectively eliminate any residual fishiness.
Incorporating other aromatic herbs and spices into your cooking can also significantly enhance the flavor profile while combating odors. Bay leaves, lemongrass stalks (bruised), garlic cloves, and fresh chili peppers are excellent choices. These ingredients release their essential oils during cooking, creating a fragrant steam or sauce that complements the mussels beautifully.
For particularly stubborn cases, or if you are very sensitive to fishy smells, a brief milk soak can be effective. Submerge the cleaned mussels in a bowl of milk for about 15-20 minutes in the refrigerator. The casein proteins in milk are believed to bind with the odor-causing compounds, drawing them out. Rinse thoroughly with cold water before cooking.
A quick blanching step can also contribute to both cleanliness and ease of cooking. Briefly boil the cleaned mussels in a large pot of water for 30 seconds to 1 minute, just until their shells begin to open. Discard the blanching liquid (which will contain some impurities) and proceed with your recipe. This also makes it easier to remove the meat if you plan to use it without the shells.
The cooking method you choose can also play a role in enhancing flavor and ensuring a pleasant experience. Steaming is perhaps the most classic and gentle method for cooking mussels. Aromatic liquids like white wine, beer, or broth, infused with garlic, herbs, and chili, create a flavorful steam that gently cooks the mussels to perfection, preserving their natural sweetness.
Sautéing or stir-frying mussels offers a quick and flavorful alternative. By cooking them in a hot pan with butter or olive oil, along with aromatics like garlic, shallots, and chili, you can achieve a wonderfully rich sauce. The high heat helps to quickly open the shells and cook the meat, sealing in the flavors.
For a smoky twist, consider grilling your green mussels. They can be placed directly on a hot grill, or for easier handling and infusion of flavor, wrapped in foil packets with herbs, butter, and a splash of wine. The smoky char adds another dimension to their natural briny taste.
Mussels are also excellent additions to soups, stews, and curries. Their rich flavor contributes depth to the broth, while they absorb the spices and aromatics of the dish. Thai green curry with mussels, or a hearty seafood bouillabaisse, are fantastic examples of how mussels can elevate a meal.
Once your mussels are perfectly cleaned and ready, you can embark on countless culinary adventures. Popular recipes include Mussels in White Wine Garlic Sauce, Spicy Sambal Mussels, Mussels with Lemongrass and Coconut Milk, or a simple Garlic Butter Mussels. Each recipe highlights the mussel’s natural flavor while incorporating complementary ingredients.
Proper storage is crucial for maintaining freshness. Before cooking, store live mussels in the coldest part of your refrigerator (usually the bottom shelf) in an open bowl or a mesh bag, covered with a damp cloth. Never store them in an airtight container or submerged in water, as they need to breathe. Consume them within 1-2 days of purchase.
After cooking, any leftover mussel meat or mussels in their shells should be stored in an airtight container in the refrigerator. Consume them within 1-2 days. Reheat gently to prevent the meat from becoming tough or rubbery.
Always ensure mussels are cooked thoroughly. Mussels are done when their shells have opened. Discard any mussels that remain closed after cooking. Overcooking can lead to tough, rubbery meat, so aim for just-opened shells for optimal texture and tenderness.
To recap, avoid these common pitfalls: skipping the depuration process, which leaves sand; not debearding, which leaves an inedible fibrous texture; storing mussels in airtight containers, which suffocates them; and overcooking, which ruins their texture. Following the steps outlined in this guide will help you steer clear of these mistakes.
The reward for your careful preparation is a truly remarkable culinary experience. Perfectly cooked green mussels, free from any unpleasant odors or gritty textures, offer a taste of the ocean that is both elegant and satisfying. They are a testament to the fact that with a little knowledge and care, even seemingly challenging ingredients can be mastered in the home kitchen.
By diligently following these steps—from careful selection and thorough depuration to meticulous scrubbing, debearding, and incorporating odor-neutralizing techniques—you can consistently prepare green mussels that are not only safe and delicious but truly exceptional. Embrace the journey of preparing this wonderful seafood, and savor the pure, unadulterated taste of the sea in every bite.