The process of cleaning blood clams might seem daunting at first, especially if you’ve encountered sandy clams in the past. The key lies in patience, the right techniques, and understanding the clam’s natural behavior. This comprehensive guide will walk you through every step, ensuring your blood clams are impeccably clean and ready to be enjoyed.
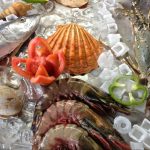
Before we dive into the cleaning process, it’s essential to select fresh, live blood clams. Look for shells that are tightly closed. If any are slightly open, tap them gently; a live clam should close its shell. Discard any clams with cracked shells or those that remain open after tapping, as they are likely dead and unsafe to consume.
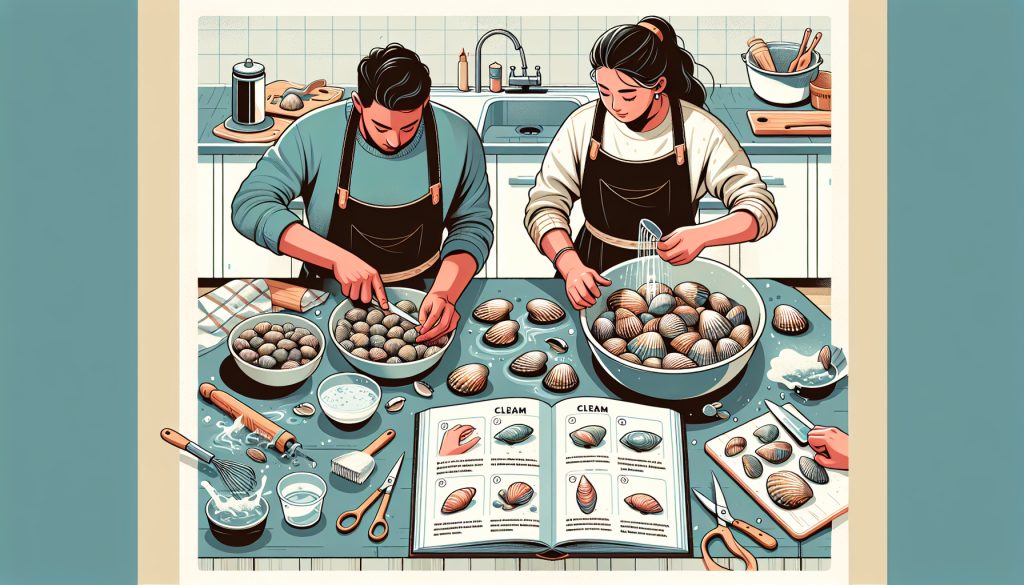
The first crucial step in cleaning is a preliminary rinse. Place your live blood clams in a large bowl or colander. Under cold running water, gently swish them around. This initial rinse helps to remove any loose dirt, mud, or external debris clinging to the shells. Don’t scrub them vigorously at this stage; the goal is just to get the surface clean.
Once rinsed, it’s time for the ‘purging’ process, also known as ‘soaking’ or ‘bleeding’. This is where the magic happens, and the clams expel the sand and grit from within their shells. Fill a large bowl or basin with cold, clean water. The water should be enough to completely submerge the clams.
Add a tablespoon or two of salt to the water. This mimics the salinity of their natural environment and encourages the clams to relax and open slightly, thereby releasing the ingested sand. Some people also add a small piece of metal, like a clean spoon or fork, to the water. The theory is that this might further stimulate the clams to purge.
Submerge the blood clams in the salted water. Ensure they are in a single layer if possible, or at least not piled too high, to allow for better water circulation and easier sand expulsion. Leave them to soak in a cool, dark place for at least 2-4 hours. For optimal results, especially if you suspect they are very sandy, you can extend this soaking period up to 24 hours.
During the soaking period, it is vital to change the water periodically. Ideally, change the water every hour for the first few hours, and then every 2-3 hours thereafter. You will notice the water becoming progressively cloudy and sandy as the clams release their contents. Discard the cloudy water and replace it with fresh, cold, salted water. This step is paramount in ensuring the sand doesn’t get re-ingested by the clams.
After the initial soaking and purging period, it’s time for a more thorough cleaning of the shells themselves. Carefully remove the clams from the soaking water, one by one. Use a stiff brush (a vegetable brush or an old toothbrush works well) to scrub the exterior of each clam. Pay attention to any barnacles, mud, or other stubborn debris adhering to the shell surface.
Rinse the brushed clams under cold running water again. This helps to wash away any loosened dirt from the scrubbing process. At this point, you should see a significant reduction in the amount of visible dirt on the shells.
After scrubbing and rinsing, it’s a good idea to repeat the purging process, especially if your clams were particularly sandy or if you plan to cook them in a way where sand would be highly noticeable (like in a clear broth). Return the scrubbed clams to a fresh bowl of cold, salted water and let them soak for another hour or two, changing the water once more if it becomes cloudy.
Some culinary traditions advocate for a final ‘boiling’ or ‘blanching’ step to ensure absolute cleanliness and to help open the shells for easier consumption. Bring a pot of water to a rolling boil. Carefully add the cleaned clams to the boiling water.
Boil the clams for just a few minutes, typically 2-5 minutes, until they just begin to open. Do not overcook them at this stage, as this can make them tough. The purpose of this brief boil is to shock the clams, causing them to expel any remaining sand and to partially open, making the grit even more accessible.
Immediately drain the blanched clams and rinse them under cold water to stop the cooking process. At this point, you can carefully inspect the inside of the partially opened shells. If you see any remaining grit, you can use a small brush or even your fingers to gently dislodge it.
For those who prefer to be absolutely certain, a final rinse under running water after blanching can be very effective. Gently agitate the clams in a colander under a stream of cold water. The slight opening from the blanching should allow any residual sand to wash away more easily.
Another effective method for ensuring sand-free clams, particularly for those who dislike the purging process or are short on time, is to steam them. Arrange the cleaned clams in a steamer basket over simmering water. Cover and steam until the clams open, which usually takes about 5-10 minutes.
As the clams steam open, they tend to expel any remaining internal impurities. The steam helps to loosen and flush out the sand. Once opened, discard any clams that remain stubbornly shut, as they are likely not safe to eat. The opened clams are now ready to be enjoyed, and the steaming process itself often leaves them remarkably sand-free.
For recipes that require the clams to be fully opened before cooking, like in a pasta sauce or a seafood stew, you can use the steam or boil method mentioned earlier. The key is to ensure they have opened sufficiently to release any sand. Some chefs recommend placing the opened clams in a sieve and giving them a final rinse.
For those who are particularly sensitive to texture or are cooking a delicate dish where even a hint of grit is unacceptable, consider a post-cooking inspection. After steaming or boiling, gently pry open any clams that didn’t open on their own. Inspect the inside and remove any visible sand. This is an extra step, but it guarantees a perfectly clean result.
It’s important to note that some sand is almost inevitable with certain types of shellfish. The goal of cleaning is to minimize it to a point where it doesn’t detract from the dining experience. Thorough purging and rinsing are your best allies.
The type of blood clam can also influence how much sand they contain. Clams harvested from very fine, silty mud beds might require more extensive cleaning than those from coarser sand. Adjust your cleaning time and intensity based on the appearance and source of your clams.
Storing cleaned blood clams properly is also important. If you’ve cleaned them and aren’t cooking them immediately, store them in a breathable container in the refrigerator. Cover them with a damp cloth or paper towel, but do not seal them in an airtight container, as they need to breathe. They are best cooked within a day or two of purchase.
When preparing recipes, consider the cooking method. Dishes with broths or sauces will highlight any remaining sand more than a stir-fry where the sand might be masked by other ingredients. Therefore, for clear broths or delicate preparations, extra attention to cleaning is warranted.
The salt concentration in the purging water is also a factor. Too little salt, and the clams may not purge effectively. Too much salt, and you might shock or even kill them prematurely. A general rule of thumb is about 1-2 tablespoons of salt per quart (liter) of water.
The temperature of the water used for soaking is equally important. Always use cold water. Warm water can cause the clams to open prematurely and die, potentially releasing unwanted bacteria and making them unsafe for consumption. Keeping them cool mimics their natural environment and encourages a slow, steady purge.
Some individuals advocate for adding a small amount of cornmeal or flour to the soaking water. The idea is that the clams ingest these particles, which then help to push out the sand. While anecdotal evidence exists, the effectiveness is debated, and it’s generally considered less reliable than salted water and thorough rinsing.
For those who are extremely cautious, a final ‘wash’ of the opened clam meat itself (after cooking and shucking) can be performed. Gently rinse the clam meat under cold water before adding it to your dish. This is a meticulous step, usually reserved for high-end culinary applications.
Ultimately, the most effective cleaning strategy for blood clams involves a combination of thorough rinsing, adequate purging in salted water with regular water changes, and a final rinse or brief cooking stage to encourage the expulsion of any remaining grit. Patience is key throughout the entire process.
Enjoying fresh, sand-free blood clams is a rewarding culinary experience. By following these detailed steps, you can confidently prepare this delicious shellfish, ensuring every bite is pure enjoyment, free from any unwanted surprises.
Remember to always prioritize freshness and proper handling. When in doubt, it’s always better to spend a little extra time cleaning than to risk a sandy dish. Happy cooking!
The journey from the seabed to your plate can be fraught with tiny grains of sand. However, with the right techniques and a little dedication, you can transform potentially gritty blood clams into a culinary masterpiece. This comprehensive guide has armed you with the knowledge to tackle even the sandiest of clams, ensuring a delightful and clean eating experience every time.