
Understanding the anatomy of an oyster is the first step towards mastering the art of shucking. An oyster shell consists of two halves: the flatter, top ‘lid’ shell and the deeper, cupped ‘bowl’ shell. The adductor muscle is the key to keeping these two shells tightly closed. This muscle is what you’ll need to sever to gain access to the delicious meat within. Recognizing these parts will make the shucking process much more intuitive.
Before you even think about picking up an oyster knife, proper preparation is paramount. Ensure you have a clean, stable work surface. A damp, folded kitchen towel or a specialized oyster mat can provide a non-slip base for the oysters, preventing them from rolling around and making the process safer and more manageable.
Let’s talk about the oysters themselves. Freshness is key, and there are several indicators. Oysters should smell like the sea – fresh, clean, and briny, not fishy or ammonia-like. Their shells should be tightly closed, or they should close when tapped lightly. If an oyster’s shell is gaping open and doesn’t close, it’s likely dead and should be discarded.
Washing your oysters before shucking is an important hygiene step. Gently scrub the exterior of the oyster shells under cold running water using a stiff brush. This removes any mud, sand, or debris that might be clinging to the shell, ensuring a cleaner shucking process and a purer taste when you finally enjoy the oyster.
Now, for the core technique: finding the ‘keyhole’. This is the small, V-shaped notch or indentation at the hinge of the oyster shell, where the two halves meet. This is the most vulnerable point and the ideal place to insert your oyster knife.
Position the oyster on your prepared surface with the hinge facing you. If you’re right-handed, place the oyster so the hinge is to your left. If you’re left-handed, position it to your right. This orientation allows for the most natural and secure grip.
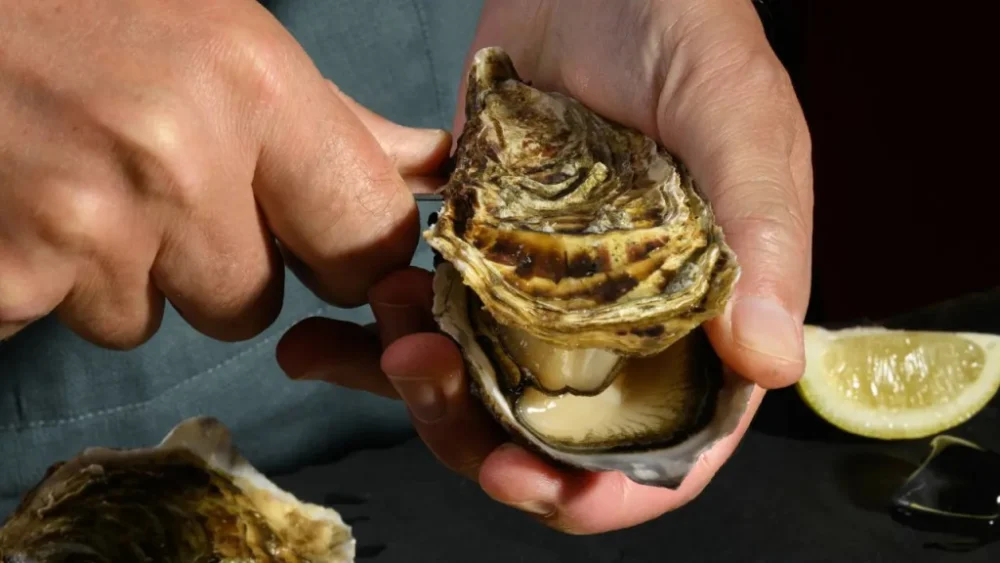
Grip the oyster firmly with your gloved hand, ensuring your fingers are well away from the hinge area. The oyster should be nestled securely in the towel or mat.
Carefully insert the tip of your oyster knife into the ‘keyhole’ at the hinge. Apply gentle, steady pressure. You’re not trying to force it; rather, you’re trying to work the knife into the seam between the shells.
Once the knife tip is inserted, gently rock the knife back and forth, applying slight upward pressure. The goal is to create a small gap between the shells. You might feel a slight ‘pop’ as the shells begin to separate.
This is a critical juncture. As soon as you feel or hear the shells separating, stop rocking. You’ve created enough of a gap. Now, carefully slide the tip of the knife along the top shell, aiming to sever the adductor muscle. This muscle is located towards the cupped side of the shell, roughly one-third of the way down from the hinge.
Be mindful of the angle of your knife. Keep it relatively flat against the top shell to avoid digging too deeply into the oyster meat or damaging the bottom shell unnecessarily. Precision is more important than brute force here.
Once the adductor muscle is severed, you should be able to lift the top shell off with ease. If it still feels resistant, a slight wiggle of the knife might be needed, but avoid prying forcefully, which can break the shell or spill the oyster liquor.
After removing the top shell, inspect the oyster. There might be small shell fragments. Use the tip of your knife to gently scrape these away. It’s also a good practice to run the knife along the bottom of the oyster to ensure the adductor muscle is fully detached from the bowl shell. This makes for a cleaner presentation and easier eating.
The oyster liquor – the natural juices inside the shell – is precious. It holds much of the oyster’s flavor. Try to keep as much of this liquor in the bowl shell as possible throughout the shucking process. If you accidentally spill some, don’t worry too much, but be mindful of it.
Serving your freshly shucked oysters is the final, delightful step. Oysters are best served immediately after shucking. Arrange them on a bed of crushed ice to keep them chilled. A classic accompaniment is a mignonette sauce (a mixture of red wine vinegar, shallots, and cracked black pepper), lemon wedges, or hot sauce.
For those who prefer a slightly more gourmet presentation, consider serving oysters on a tiered stand. The crushed ice not only keeps them cold but also creates an elegant visual display. Ensure each oyster is stable in its bowl shell.
When it comes to eating oysters, the ‘slurp’ is often part of the ritual. Gently lift the oyster from its shell, using your fork or the shell itself to loosen it completely. Then, bring the shell to your lips and inhale the oyster and its liquor in one smooth motion. Savor the complex flavors and textures.
If you’re not planning to serve your oysters immediately after shucking, it’s best to store them properly. Keep them in the refrigerator, ideally in an open container covered with a damp cloth, cupped side down to retain their liquor. Shuck them just before serving for the best taste and texture.
Safety is paramount throughout the entire process. Always use a sharp oyster knife, as a dull knife requires more force and increases the risk of slipping. Keep your fingers protected with a cut-resistant glove. Never rush the process; patience and precision are your best allies.
What if the oyster is particularly stubborn? Sometimes, the adductor muscle is very strong, or the shells are tightly sealed. In such cases, you might need to try inserting the knife at a slightly different angle, or gently work it along the seam. Avoid excessive force. If an oyster proves impossible to open without extreme effort, it might be best to discard it, especially if you’re unsure of its freshness.
Different oyster varieties have slightly different shell shapes and thicknesses, which can affect the shucking technique. Some oysters, like the Pacific oysters, have thicker, more irregular shells, while East Coast oysters tend to have smoother, more uniform shells. Familiarize yourself with the type of oyster you are shucking.
For those who find manual shucking challenging, electric oyster openers are available. These devices can be effective but often come with a higher price point and may not provide the same tactile satisfaction as manual shucking. They are an option for those with physical limitations or who shuck oysters in very high volumes.
Practicing regularly will significantly improve your oyster shucking skills. The more oysters you open, the more comfortable you’ll become with the feel of the knife, the oyster’s anatomy, and the subtle cues that indicate the adductor muscle is severed.
Consider taking a shucking class or watching detailed video tutorials. Visual demonstrations can be incredibly helpful in understanding the knife’s movement and the precise way to insert it. Many oyster bars and seafood markets offer workshops.
Disposing of used oyster shells responsibly is also part of the process. Oyster shells are valuable and can be recycled for various purposes, including replenishing oyster reefs, which helps marine ecosystems. Check with local recycling programs for proper disposal methods.
The joy of a perfectly shucked oyster lies not just in its taste but in the successful execution of the task. It’s a moment of connection with a natural delicacy, prepared by your own hands. With practice and attention to detail, you’ll soon be shucking oysters like a seasoned pro.
Remember, the goal is to enjoy the oyster in its purest form. The briny liquor, the tender meat, the subtle oceanic notes – all are best appreciated when the oyster is handled with care and opened cleanly. This guide is your first step towards unlocking that delicious experience.
Don’t be discouraged by initial attempts. Like any skill, oyster shucking requires patience and persistence. Each oyster you open is a learning opportunity. Celebrate your successes and learn from any minor mishaps.
Finally, always prioritize safety and freshness. These two principles will guide you to a successful and enjoyable oyster-shucking experience, allowing you to fully appreciate the exquisite flavor of these remarkable bivalves.


