Clams are sustainable, packed with protein, and rich in minerals like iron and vitamin B12. They offer a sweet, briny flavor that captures the essence of the ocean, serving as the perfect centerpiece for pasta dishes, chowders, or simple steamed appetizers. Whether you are planning a summer seafood boil or a cozy winter linguine dinner, mastering the basics of clam preparation is an essential culinary skill.
In this complete guide, we will walk you through everything you need to know about handling these mollusks. From selecting the freshest catch at the market to the crucial step of purging sand, and finally, exploring the best cooking methods, you will gain the confidence to cook clams like a pro.
Understanding Clam Varieties
Before you fire up the stove, it is helpful to know what you are buying. Clams come in various shapes and sizes, and the variety you choose will dictate the best cooking method. Generally, clams are categorized into two main types: hard-shell and soft-shell.
Hard-Shell Clams (Quahogs): These are the most common varieties found in grocery stores. On the East Coast of the US, they are often categorized by size. Littlenecks are the smallest and sweetest, perfect for eating raw, steaming, or tossing into pasta. Cherrystones are medium-sized and great for grilling or stuffing. Chowder clams are large and tough, meant to be chopped up for soups and fritters.
Soft-Shell Clams (Steamers): Despite the name, their shells are actually quite brittle and remain slightly open because of their long siphons. These are the classic ‘steamers’ often served with drawn butter and broth. They require a bit more cleaning but are prized for their tender meat.
Razor Clams: Long and narrow, looking somewhat like an old-fashioned straight razor, these clams are popular in Asian and Spanish cuisines. They are excellent when grilled or sautéed quickly with garlic and herbs.
How to Select and Buy Fresh Clams
The most critical step in cooking clams happens at the fishmonger’s counter. Since clams are sold live, freshness is paramount for both flavor and food safety. Knowing what to look for ensures you bring home a safe and delicious product.
The Smell Test
Fresh clams should smell like the ocean—salty, clean, and fresh. They should never smell fishy, sour, or like ammonia. If you detect a strong, unpleasant odor, do not buy them.
The Tap Test
Clams should be alive when you cook them. For hard-shell clams, the shells should be tightly closed. If a shell is slightly open, give it a gentle tap on the counter or flick it with your finger. If the clam is alive, it will snap its shell shut. If it remains open or the shell is cracked or broken, discard it immediately.
Storing Clams Before Cooking
Once you have purchased your clams, you need to keep them alive until dinner time. Do not store them in a sealed plastic bag, as they need to breathe. Instead, place them in a bowl or a colander set over a bowl.
Cover the clams with a damp cloth or paper towel and place them in the coldest part of your refrigerator. Never submerge them in fresh water for storage, as this will kill them. Ideally, you should cook them within 24 hours of purchase.
The Crucial Step: Cleaning and Purging Clams
How to Purge Clams
- Make a Saltwater Bath: Mix roughly 1/3 cup of sea salt (not table salt, which contains iodine) with 1 gallon of cold water. You want to replicate the salinity of the ocean.
- Soak: Submerge the clams in the water and let them sit for 20 to 30 minutes. During this time, they will filter the water and expel sand from their shells.
- Lift, Don’t Pour: When removing the clams, lift them out of the water with your hands or a slotted spoon rather than pouring the water into a colander. Sand will have settled at the bottom of the bowl, and pouring will just dump it back onto the clams.
After purging, scrub the outside of the shells with a stiff kitchen brush under cold running water to remove any barnacles, mud, or debris. For soft-shell clams, you may also need to peel the skin off the siphon after cooking.
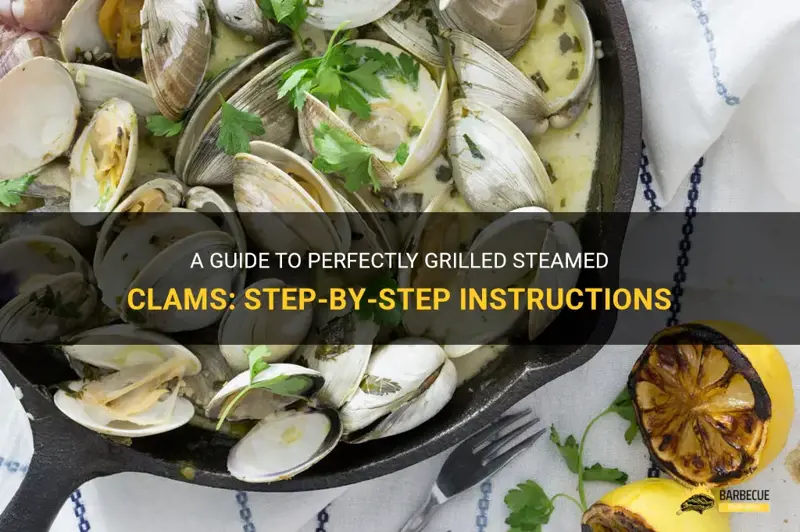
Method 1: Steaming (The Classic Approach)
Steaming is arguably the most popular and simplest way to cook clams. It preserves the delicate flavor of the seafood and creates a delicious broth perfect for dipping crusty bread.
To steam clams, start by sautéing aromatics like minced garlic, shallots, or onions in butter or olive oil in a large pot. Once fragrant, add a liquid. Dry white wine is the traditional choice, but beer, cider, or even chicken broth works well.
Increase the heat to medium-high and add the cleaned clams to the pot. Cover immediately with a tight-fitting lid. The steam trapped inside will cook the clams gently. Shake the pot occasionally to ensure even cooking.
Check the clams after about 5 to 7 minutes. They are done as soon as their shells pop open. Remove the open clams with tongs and set them aside. If some haven’t opened, cover and cook for another minute or two. Important: Discard any clams that refuse to open after a reasonable cooking time; this indicates they were likely dead before cooking.
Method 2: Clams with Pasta
Spaghetti alle Vongole is an iconic Italian dish that highlights the clam’s natural juices. The process is similar to steaming, but you finish the pasta in the sauce.
Start by boiling your pasta in salted water until it is just shy of al dente. While the pasta cooks, sauté plenty of garlic and red pepper flakes in olive oil. Add the clams and a splash of white wine, then cover to steam.
Once the clams open, remove them from the pan (you can shell them or leave them in shells for presentation). Add the undercooked pasta directly into the skillet with the clam juice. Toss vigorously over heat, adding parsley and a knob of butter to emulsify the sauce. The starch from the pasta will thicken the clam liquor into a creamy, savory coating.
Method 3: Grilling Clams
Grilling imparts a smoky flavor that pairs beautifully with the brininess of the clams. This method is perfect for summer gatherings and requires minimal cleanup.
Preheat your grill to medium-high heat. Place the cleaned clams directly on the grate. Close the lid and let them cook for about 5 to 10 minutes. As soon as they pop open, carefully remove them with tongs to avoid spilling the precious juice inside.
Serve grilled clams immediately with a drizzle of melted butter, lemon juice, and a dash of hot sauce. The smoky char on the shell adds a rustic element to the presentation.
Common Mistakes to Avoid
Even though cooking clams is straightforward, there are a few pitfalls to watch out for to ensure the best quality dish.
Overcooking: Clams cook very quickly. If you leave them on the heat too long, the meat will shrink and turn rubbery. Remove them from the heat the moment they open.
Under-seasoning the Broth: Clams are salty, but the broth needs balance. Don’t forget acidic elements like lemon juice or white wine to cut through the richness.
Ignoring the "Dead" Clams: We cannot stress this enough—if a clam is open before cooking and won’t close, throw it away. If it stays closed after cooking, throw it away. Food safety comes first.
Flavor Pairings and Serving Suggestions
Clams are versatile and pair well with a variety of flavors. Beyond the classic garlic and butter, consider experimenting with different cuisines.
For a Thai-inspired dish, steam clams in coconut milk with lemongrass, ginger, lime leaf, and chili. For a Spanish twist, cook them with chorizo, paprika, and sherry. Fresh herbs like parsley, cilantro, basil, and tarragon are excellent garnishes that add brightness to the dish.
Frequently Asked Questions (FAQ)
Q: Can I freeze fresh clams?
It is best to cook clams fresh, but you can freeze them in the shell. Scrub them clean and place them in moisture-vapor-resistant bags. However, the texture may change slightly, so frozen clams are best used in soups or chowders.
Q: Does the cornmeal trick work for purging?
Some cooks swear by adding cornmeal to the purging water, believing the clams will eat it and clean themselves out. While this may plump the clams slightly, simple saltwater is generally sufficient and more effective for removing sand.
Q: Are clams healthy?
Yes, clams are a lean source of protein and are high in omega-3 fatty acids, iron, and vitamin B12, making them a nutritious addition to your diet.
Conclusion
Cooking clams at home opens up a world of culinary possibilities, from elegant pasta dinners to rustic backyard boils. By focusing on proper selection, thorough cleaning, and careful timing during cooking, you can enjoy tender, flavorful shellfish without the restaurant price tag. Remember the golden rules: keep them cold, let them breathe, purge the sand, and never force a closed clam open. With these tips in hand, you are ready to master the art of cooking clams.