The secret to perfect squid lies not in complex equipment or hours of marinating, but in understanding the science of heat and timing. Pan-searing is arguably the best method for highlighting the natural sweetness of the seafood while adding a smoky, caramelized depth that boiling or steaming simply cannot achieve. By mastering a few fundamental techniques, you can transform this humble seafood into a restaurant-quality dish.
Why Pan-Searing is the Superior Method
Pan-searing involves cooking food quickly at a high temperature in a shallow pan. For squid, this method is ideal because it minimizes the cooking time. Squid muscle fibers tighten rapidly when exposed to heat. Prolonged cooking toughens the collagen, resulting in a chewy texture. Searing hits the sweet spot: it cooks the flesh fast enough to remain tender while developing a golden crust via the Maillard reaction.
Additionally, pan-searing allows for immediate flavor integration. Unlike deep-frying, which masks the squid in batter, searing allows the seafood to interact directly with olive oil, garlic, herbs, and spices. The result is a lighter, healthier dish that doesn’t compromise on flavor.
Choosing the Best Squid
Great cooking starts with great ingredients. When shopping for squid, you will generally find it in two forms: fresh or frozen. While fresh is always preferable if you live near a coast, modern flash-freezing technology means that frozen squid is often of excellent quality. Look for tubes (bodies) and tentacles that appear white or ivory with a translucent quality. Avoid squid that looks dull, yellowing, or has a strong, fishy ammonia odor.
If you are buying whole squid, look for clear eyes and firm flesh. Cleaning squid is a straightforward process, but for convenience, buying pre-cleaned tubes and tentacles is a perfectly acceptable time-saver for this recipe.
Essential Preparation: The Key to a Good Sear
1. Cleaning and Sizing
If working with whole squid, remove the quill, beak, and innards. Rinse the tubes and tentacles thoroughly under cold water. For pan-searing, you can leave small tubes whole, but larger tubes should be sliced into rings or opened flat and cut into large distinct pieces. Tentacles should be left whole or halved if they are particularly large.
2. The Importance of Drying
This is the single most critical step in pan-searing squid. Moisture is the enemy of a good sear. If the squid is wet when it hits the pan, the water will turn to steam. Instead of searing, the squid will boil in its own juices, leading to a pale, rubbery result. After rinsing, lay the squid pieces on paper towels and pat them thoroughly dry. Change the towels if necessary until the surface of the seafood is tacky to the touch.
3. Scoring for Texture and Presentation
If you have opened the tubes flat, consider scoring the flesh. Using a sharp knife, make shallow diagonal cuts in a diamond cross-hatch pattern on the inside of the tube, being careful not to cut all the way through. This technique serves two purposes: it allows the heat to penetrate faster, cooking the squid evenly, and it allows marinades and seasonings to cling to the surface. Visually, the squid will curl beautifully into pinecone shapes when cooked.
Equipment You Will Need
To achieve the high heat required for this technique, the choice of cookware matters. A cast-iron skillet is the gold standard for searing squid. It retains heat exceptionally well and recovers temperature quickly after ingredients are added. If you don’t have cast iron, a heavy-bottomed stainless steel pan is a good alternative. Avoid non-stick pans if possible, as they often cannot safely reach the high temperatures needed for a true sear.
You will also need a pair of long tongs. Because the water content in squid can cause oil to splatter, tongs keep your hands safe while allowing you to turn the pieces quickly.
Step-by-Step Pan-Searing Technique
Step 1: Heat the Pan
Place your skillet over high heat. You want the pan to be smoking hot—literally. Add a high-smoke-point oil, such as grapeseed, avocado, or refined olive oil. Do not use extra virgin olive oil for the initial sear, as it will burn and become bitter. Wait until the oil shimmers and just begins to smoke.
Step 2: Season Just Before Cooking
Season the squid generously with salt and freshly cracked black pepper just moments before it goes into the pan. Salt draws out moisture, so if you season too early, the squid will become wet again, ruining your drying efforts.
Step 3: Don’t Overcrowd the Pan
Work in batches. If you put too much squid in the pan at once, the temperature of the pan will drop drastically. The squid will release liquid, and you will end up stewing the seafood rather than searing it. Place the pieces in a single layer with space between them.
Step 4: The Sear
Once the squid hits the pan, let it be. Do not move it for at least 45 to 60 seconds. You want to develop a golden-brown crust. Once browned, flip the pieces. The second side will need even less time—usually about 30 to 45 seconds. The entire cooking process should take no more than two minutes.
Step 5: Finishing Flavors
As soon as the squid is cooked, remove it from the heat immediately. This is the perfect time to toss it with delicate aromatics. A squeeze of fresh lemon juice, a drizzle of extra virgin olive oil, minced garlic, and fresh parsley are classic additions that wake up the flavors without needing to be cooked.
Flavor Variations to Try
- Mediterranean Style: Finish with lemon zest, oregano, capers, and halved cherry tomatoes.
- Spicy Asian Kick: Sear with a high-heat oil, then toss with soy sauce, lime juice, chili flakes, and fresh cilantro.
- Smoky Paprika: Dust the squid with smoked paprika before searing and serve with a garlic aioli.
Common Mistakes to Avoid
Overcooking: This is the number one offense. Squid goes from tender to tough in seconds. If you accidentally overcook it, the only way to salvage it is to braise it for 30+ minutes until the collagen breaks down again, effectively changing the dish from a sear to a stew.
Using a Cold Pan: If the pan isn’t hot enough, you won’t get color. You will get grey, chewy meat. Be patient and let the pan preheat fully.
Ignoring the Drying Step: As mentioned, wet squid will not brown. Take the extra five minutes to dry your seafood thoroughly.
Frequently Asked Questions (FAQ)
How do I know when the squid is done?
The squid is done when the flesh turns from translucent to opaque white and feels firm but springy to the touch. If you scored the squid, the cuts will have opened up distinctively.
Can I use frozen squid rings?
Yes, frozen rings work well. However, they are often treated with a solution that retains water. Thaw them completely and be extra diligent about patting them dry with paper towels before cooking.
Why did my squid release so much water?
This usually happens for two reasons: the pan wasn’t hot enough, or you crowded the pan with too many pieces at once. Always cook in small batches to maintain high heat.
Serving Suggestions
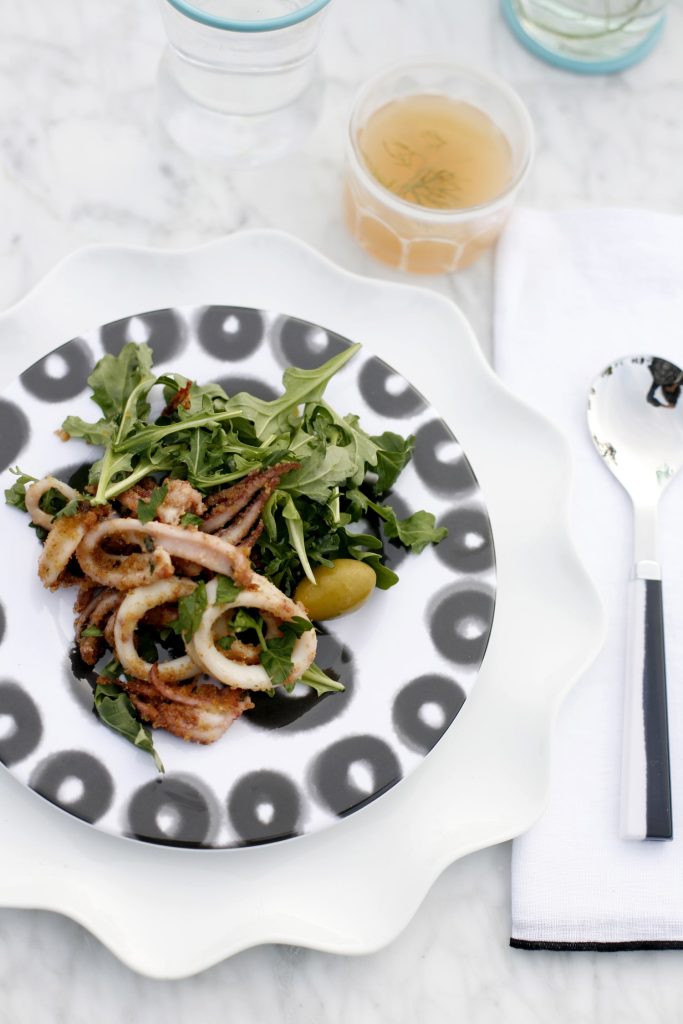
Pan-seared squid is incredibly versatile. It serves beautifully as a standalone appetizer with a wedge of lemon and crusty bread to mop up the juices. It is also excellent tossed into a warm pasta salad with arugula and garlic, or served atop a risotto. For a low-carb option, serve it over a bed of mixed greens with a vinaigrette dressing.
Conclusion
Mastering the art of pan-seared squid opens up a world of quick, healthy, and elegant culinary possibilities. By focusing on the core principles of high heat, a dry surface, and rapid cooking, you can banish the fear of rubbery calamari forever. Whether you prefer a simple lemon-garlic finish or a spicy chili glaze, these techniques provide the foundation for perfect seafood every time. Gather your ingredients, get that skillet smoking hot, and enjoy the delicate, sweet flavor of perfectly cooked squid.