The foundation of any great fried oyster dish lies in the quality of the oysters themselves. For the best results, opt for fresh, live oysters. Look for shells that are tightly closed or close firmly when tapped. If any shells are open and do not close, they are likely dead and should be discarded. The scent should be fresh and oceanic, not fishy or unpleasant. Shucked oysters can be used, but they tend to be more delicate and may break apart during frying. If using shucked oysters, ensure they are plump, firm, and have a clean, briny aroma.
When preparing live oysters for frying, proper shucking is a crucial skill. You’ll need an oyster knife, a thick glove or towel for hand protection, and a sturdy surface. Insert the knife into the hinge of the shell and gently twist to pry it open. Be careful not to spill the oyster liquor, as it adds significant flavor. Once opened, carefully run the knife along the top shell to detach the oyster meat, then detach the oyster from the bottom shell. Rinse them gently in cold water to remove any shell fragments, but be sure not to wash away all the natural liquor.
The batter is where the magic of crispiness truly happens. A classic approach involves a three-step dredging process: first in seasoned flour, then in a wet mixture (often egg wash or buttermilk), and finally in a crispy coating like seasoned breadcrumbs, cornmeal, or a mixture of both. The flour helps the wet mixture adhere, and the wet mixture helps the final coating stick, ensuring a thick, even layer that fries up beautifully.
For the seasoned flour, a simple yet effective blend includes all-purpose flour, salt, black pepper, and perhaps a pinch of cayenne pepper for a subtle kick. Ensure the oysters are thoroughly coated in this flour mixture before moving to the next step. This initial coating helps to absorb excess moisture from the oysters.
The wet mixture is essential for creating a sticky surface for the final coating. A common choice is an egg wash, made by whisking eggs with a tablespoon or two of water or milk. Alternatively, buttermilk provides a tangy flavor and tenderizes the oysters. Some chefs prefer a simple seasoned cornstarch slurry for an extra crispy, gluten-free option.
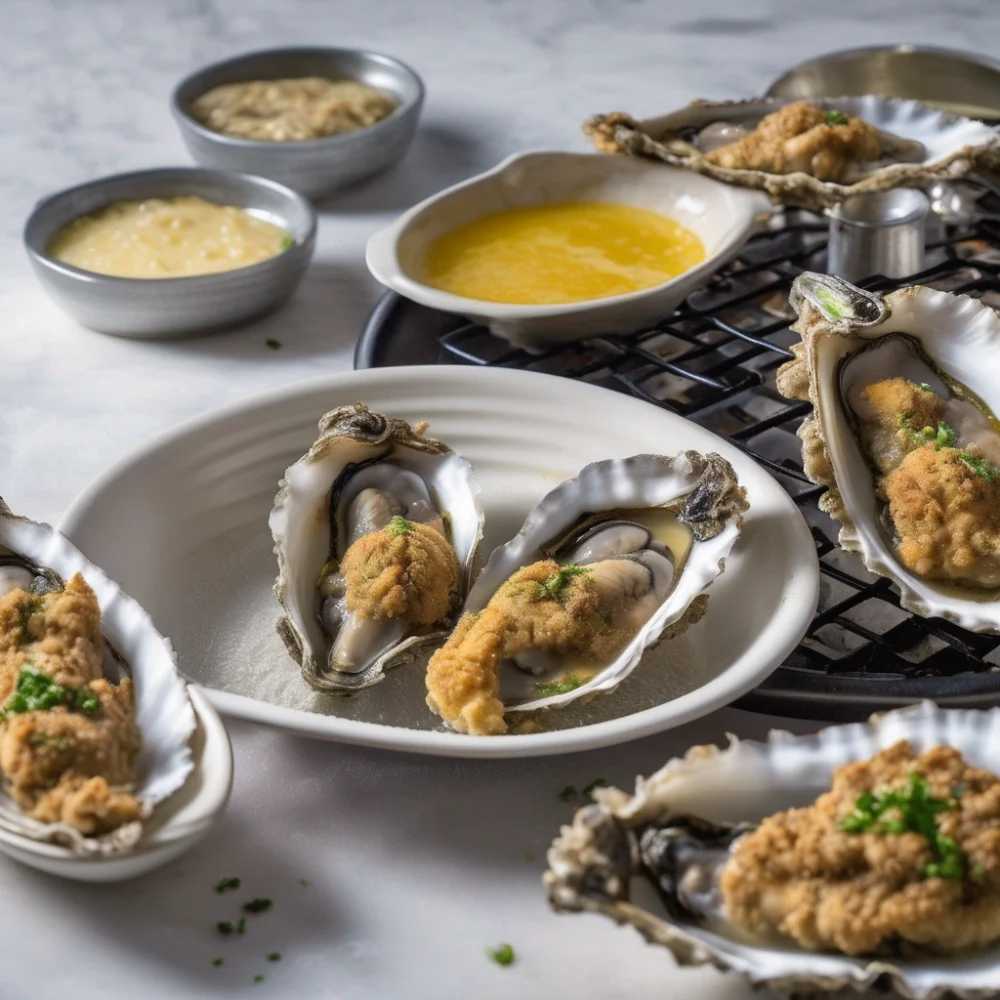
The final coating is what gives the fried oysters their signature crunch. A mixture of panko breadcrumbs and cornmeal is a popular choice, offering both lightness and texture. Panko breadcrumbs, being larger and flakier than traditional breadcrumbs, absorb less oil and create a superior crispness. Cornmeal adds a distinct flavor and a slightly coarser texture.
Seasoning is key to elevating the flavor profile of your fried oysters. Beyond salt and pepper in the flour, consider adding paprika, garlic powder, onion powder, or Old Bay seasoning to your dredging mixtures. These spices not only enhance the taste of the oysters but also add visual appeal with their warm hues.
When it comes to frying, the choice of oil and temperature are paramount. A neutral-flavored oil with a high smoke point, such as canola, vegetable, or peanut oil, is ideal. The oil should be heated to a consistent temperature, typically between 350°F and 375°F (175°C to 190°C). Using a thermometer is highly recommended to maintain this temperature range accurately.
Carefully place the dredged oysters into the hot oil, ensuring they don’t splash. Fry them for about 2-4 minutes per side, or until they are golden brown and crispy. The exact cooking time will depend on the size of the oysters and the thickness of the batter.
Once fried to perfection, remove the oysters from the oil using a slotted spoon or spider strainer. Place them on a wire rack set over a baking sheet to drain any excess oil. This is crucial for maintaining their crispiness; placing them directly on paper towels can trap steam and make them soggy.
Serving fried oysters immediately is highly recommended to enjoy them at their peak crispness. They are incredibly versatile and can be served as an appetizer, a main course, or even as a component in other dishes. A squeeze of fresh lemon juice over the top just before serving cuts through the richness and brightens the flavors.
Classic accompaniments for fried oysters include tartar sauce, cocktail sauce, or a simple remoulade sauce. These sauces provide a creamy, tangy, or spicy counterpoint to the rich, fried oysters. A side of coleslaw or french fries also makes for a satisfying meal.
For a more refined presentation, consider serving fried oysters on small toasted baguette slices, creating elegant oyster po’boy sliders. This allows for a delightful combination of textures and flavors in a single bite.
Experimenting with different batters and coatings can lead to unique and exciting variations. Consider adding finely chopped herbs like parsley or chives to your breadcrumb mixture, or incorporating a touch of smoked paprika for a deeper flavor.
Another interesting variation is a spicy batter. Incorporate sriracha or hot sauce into your wet mixture, or add chili flakes to your dry coating for a fiery kick that complements the sweetness of the oysters.
For those seeking a gluten-free option, a batter made with gluten-free flour, cornmeal, and rice flour can achieve a wonderfully crisp result. Ensure all your seasonings and coatings are also gluten-free.
Proper storage of raw oysters is essential. Keep them in the refrigerator, preferably in a mesh bag or container that allows them to breathe, with the cupped side down. They should be consumed within a few days of purchase.
When it comes to shucking, safety is paramount. Always use a protective glove or a thick towel to hold the oyster firmly. Keep your fingers away from the path of the knife. If you are uncomfortable shucking, many fish markets will shuck oysters for you.
The ‘liquor’ of the oyster, the natural brine it holds, is a treasure trove of flavor. Try to preserve as much of it as possible during shucking and preparation. It contributes significantly to the final taste of the fried oyster.
If you find your oysters are too small or delicate to bread and fry whole, consider chopping them into smaller pieces and forming them into fritters. This is a great way to utilize smaller oysters or to create a more bite-sized appetizer.
For a healthier alternative, consider air-frying your oysters. While they may not achieve the exact same level of deep-fried crispness, an air fryer can produce a satisfyingly crunchy result with significantly less oil.
When air frying, preheat your air fryer and lightly spray the battered oysters with cooking oil. Cook in batches until golden brown and cooked through, flipping halfway.
The type of oyster can also influence the final flavor. Eastern oysters are typically smaller and have a more pronounced briny flavor, while Pacific oysters are often larger and milder. Choose the type that best suits your personal preference.
Don’t be afraid to get creative with your dipping sauces. Beyond the classics, consider a mango salsa for a tropical twist, a spicy aioli, or even a simple mignonette sauce with shallots and vinegar.
For a truly authentic ‘Seafood Kaki Fry’ experience, consider serving your fried oysters with a side of seasoned fries and a squeeze of fresh lemon. This classic combination is hard to beat.
The key to consistently good fried oysters is paying attention to the details: fresh ingredients, proper technique, and consistent oil temperature. With practice, you’ll be able to whip up a batch of perfectly crispy fried oysters that will impress anyone.
Remember that practice makes perfect. The first time you try, don’t be discouraged if they aren’t absolutely flawless. Each attempt will bring you closer to mastering this delicious seafood preparation.
Enjoy the process of cooking and savoring these delightful morsels of the sea. Fried oysters are a testament to how simple ingredients, prepared with care, can result in an extraordinary culinary experience.